
1 Introduction
The Flight Thing a flight and trip tracking application for all aviation enthusiasts:
Manage all your flights and trips, track operational data
Update your flight data from live sources with the latest changes
Display comprehensive statistics
Integrate with AI tools like Claude Desktop via MCP (Model Context Protocol)
Freedom of data, export and backup your data at any time with no restrictions in a machine readable format
Import data - predefined from formats like openflights,org, flightmemory.com, flugstatistik.de, flighty.app or
Import data - customizable from any other structured format
Benefit from a secure environment based on European GDPR, data hosted in Switzerland and application run in Germany
2 First Steps
2.1 Create Account
Register an account under https://flightthing.com/auth/register. The used email address must be valid and will be validated during the sign on process. However, there will be a transition period of one week to confirm the address.
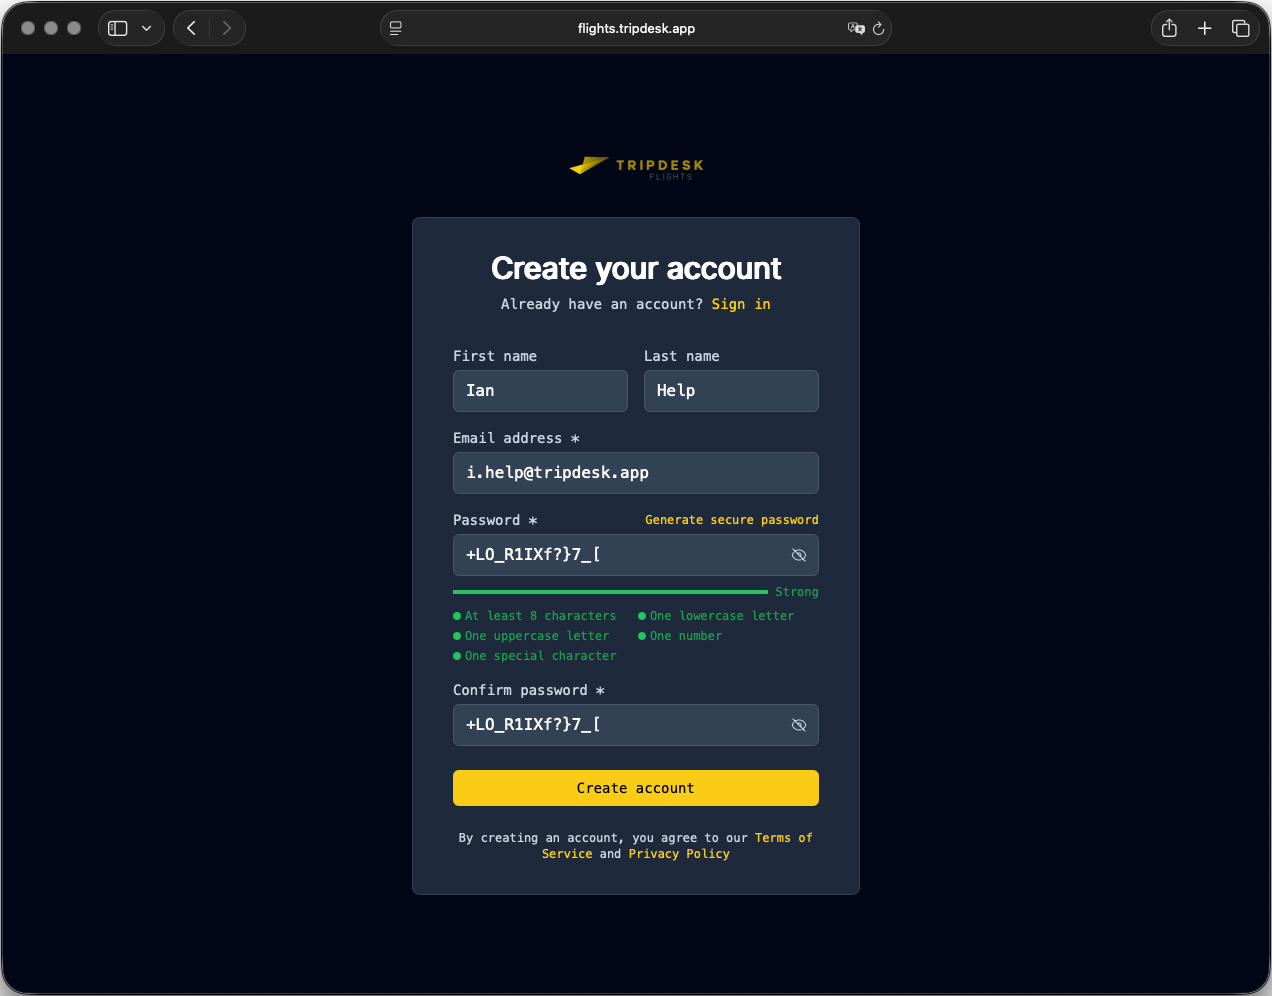
If the chosen password does not meet the our standards, a hint will be displayed.
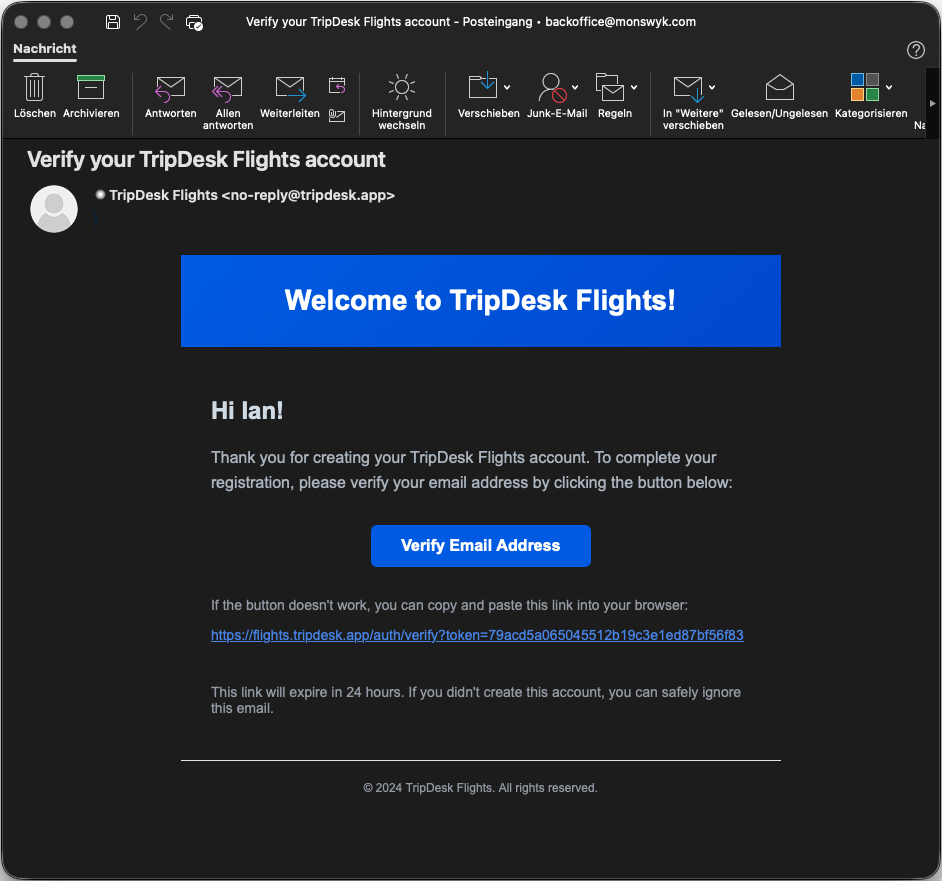
With the end of the sign on process you will receive an email.
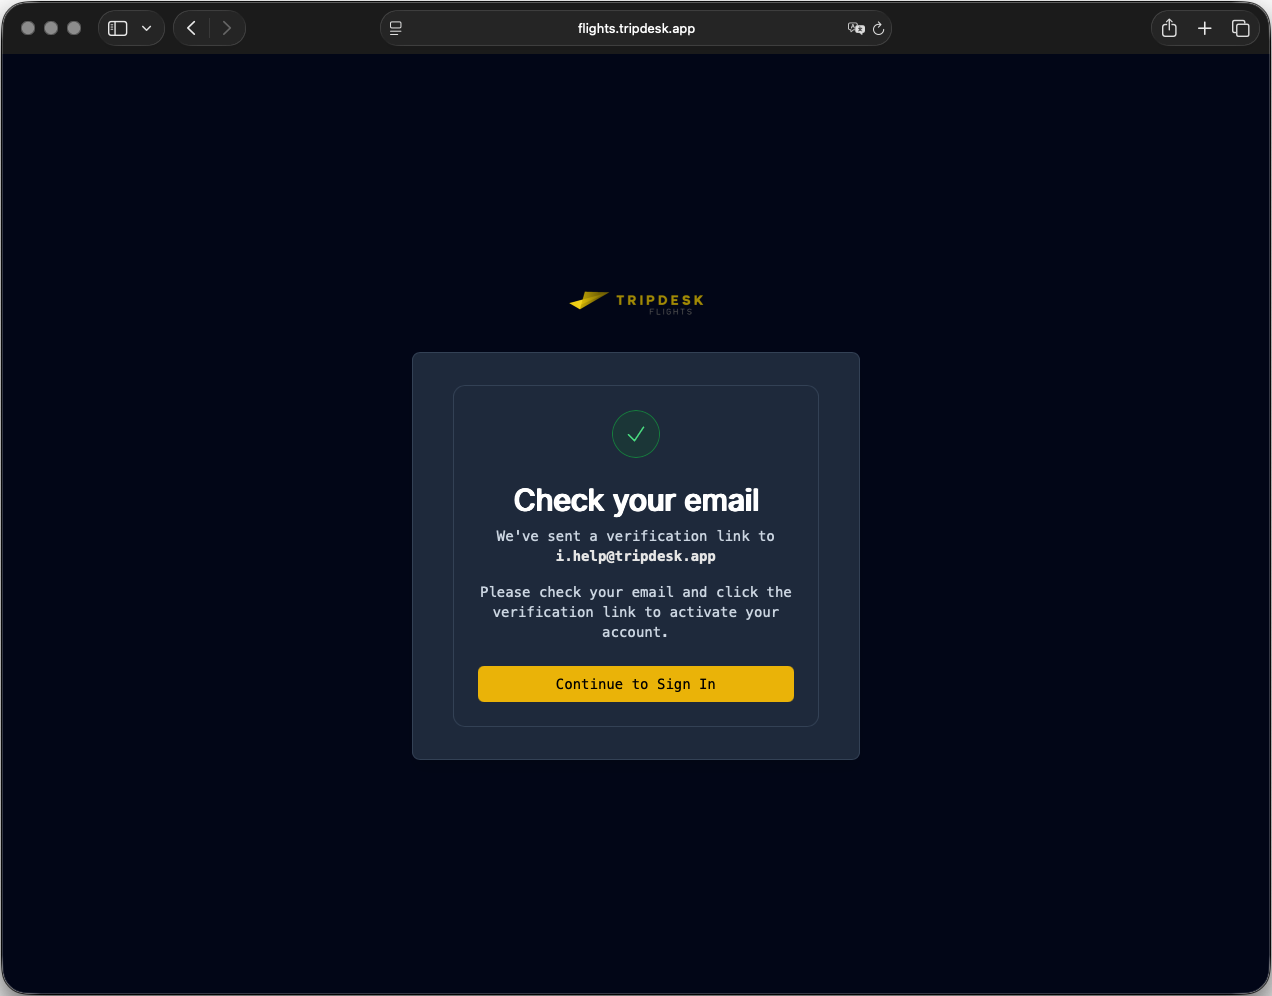
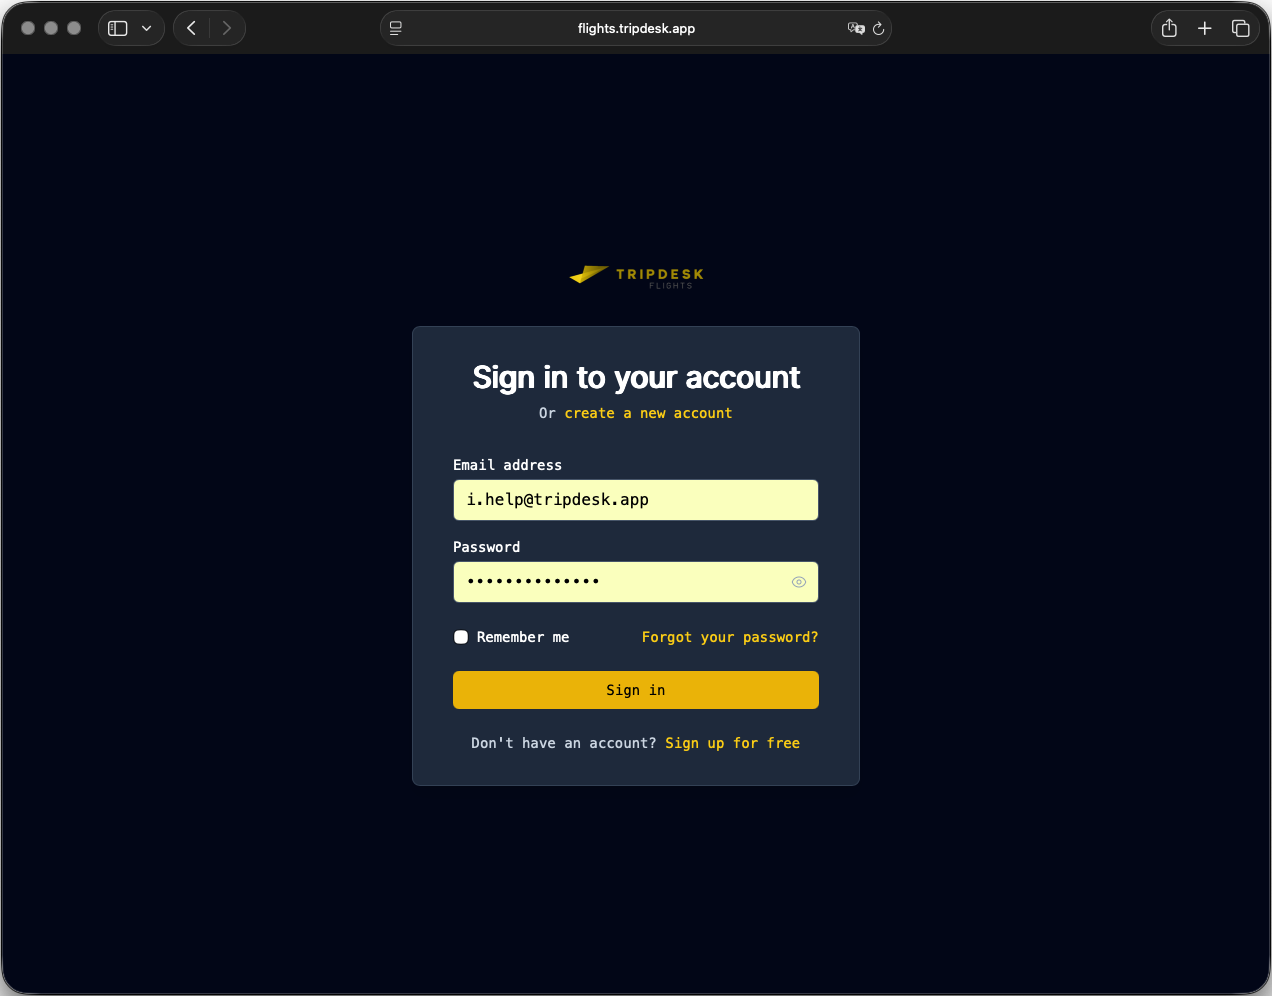
You now already able to sign in to your account.
Do not forget to confirm the link within the email.
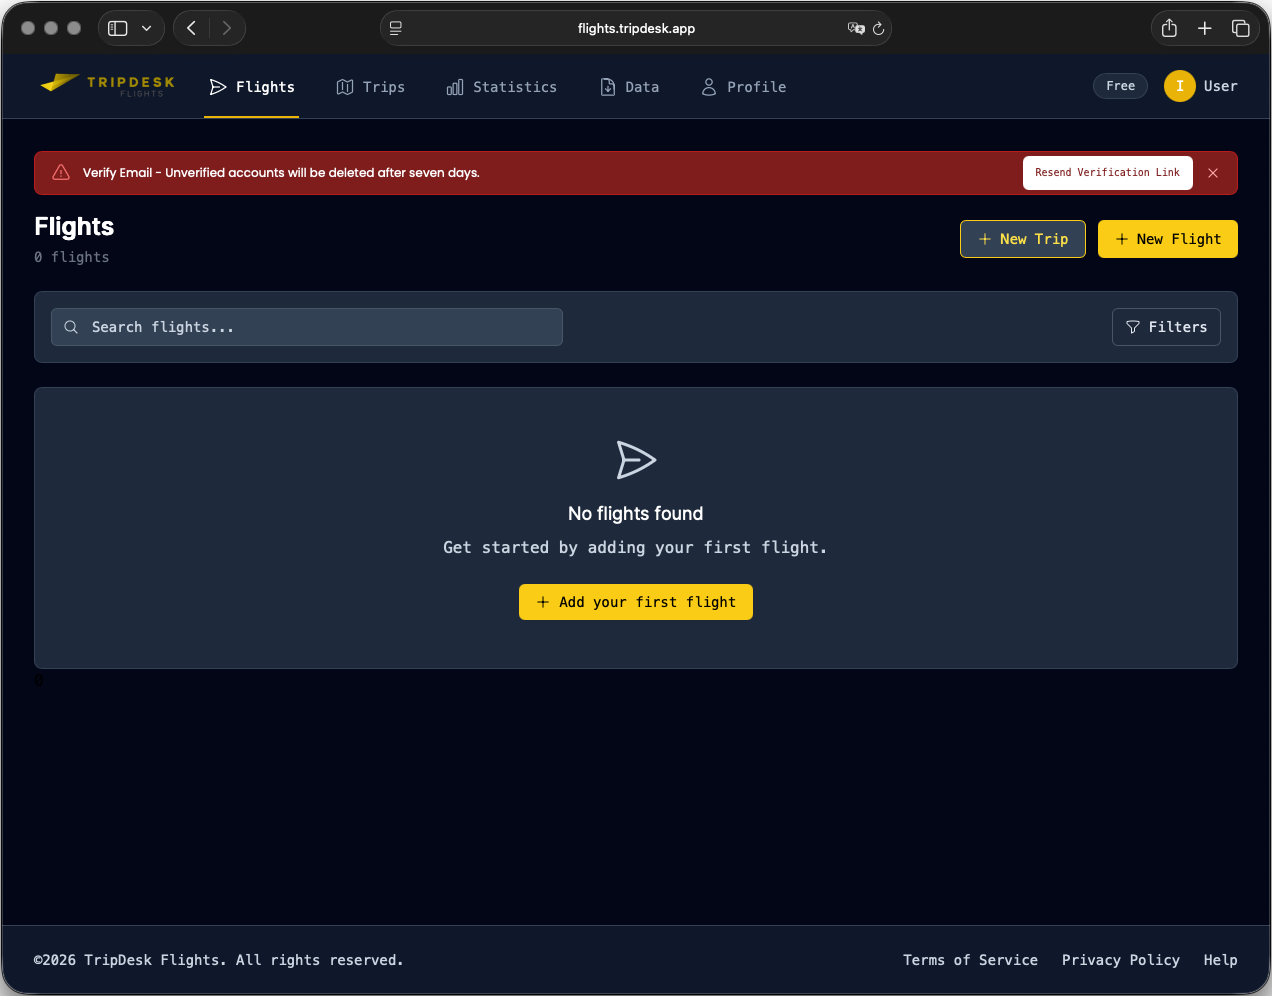
If you do not confirm the link in the email, a red warning message is being displayed. You can resend the confirmation email from there.
2.2 Set Profile
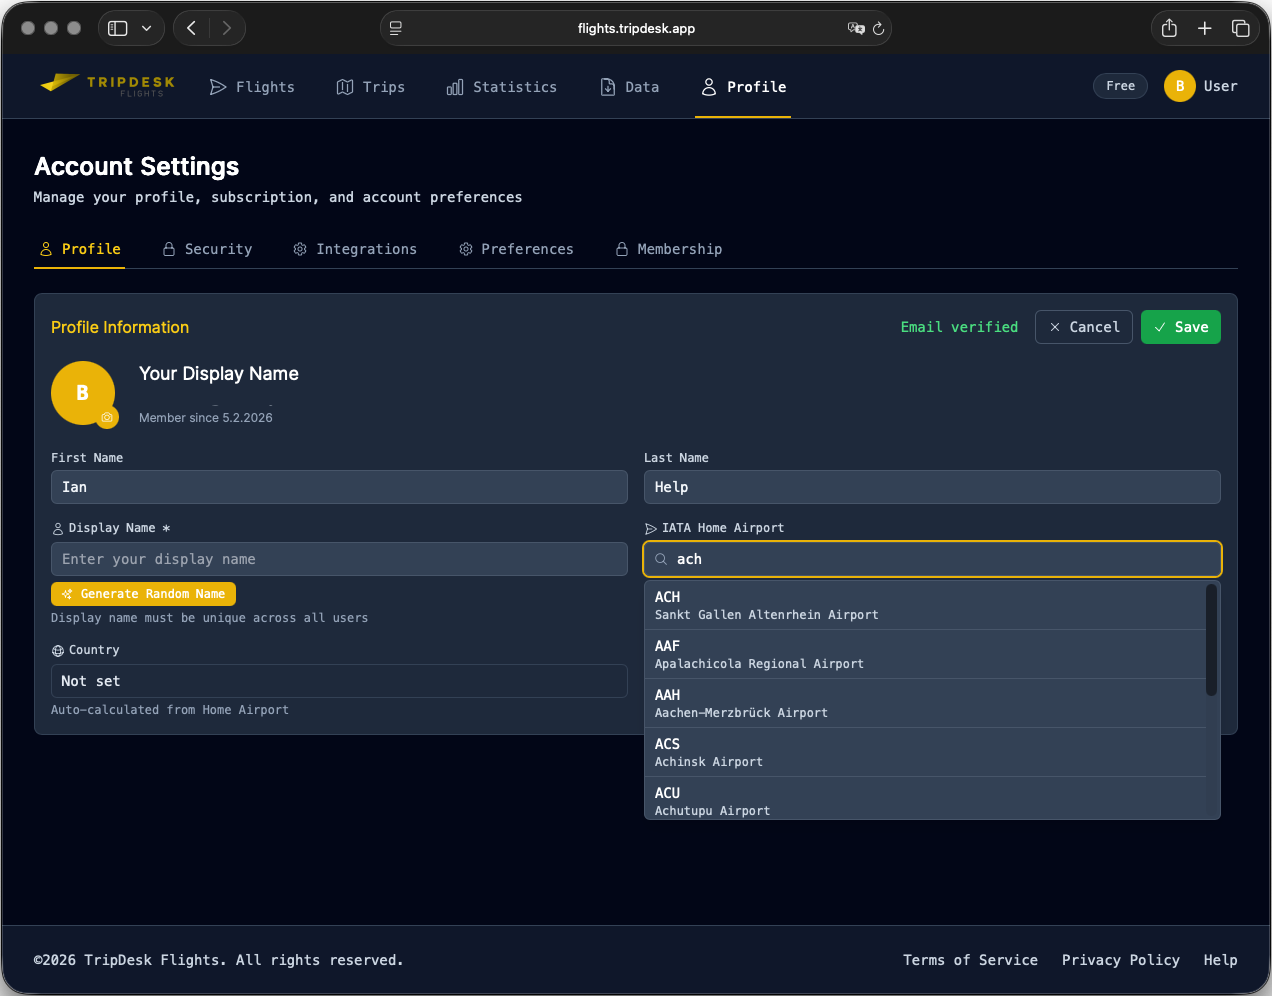
Start with setting your personal information, like home airport, user name (display name), and your profile photo.
Set your airport by setting its IATA code.
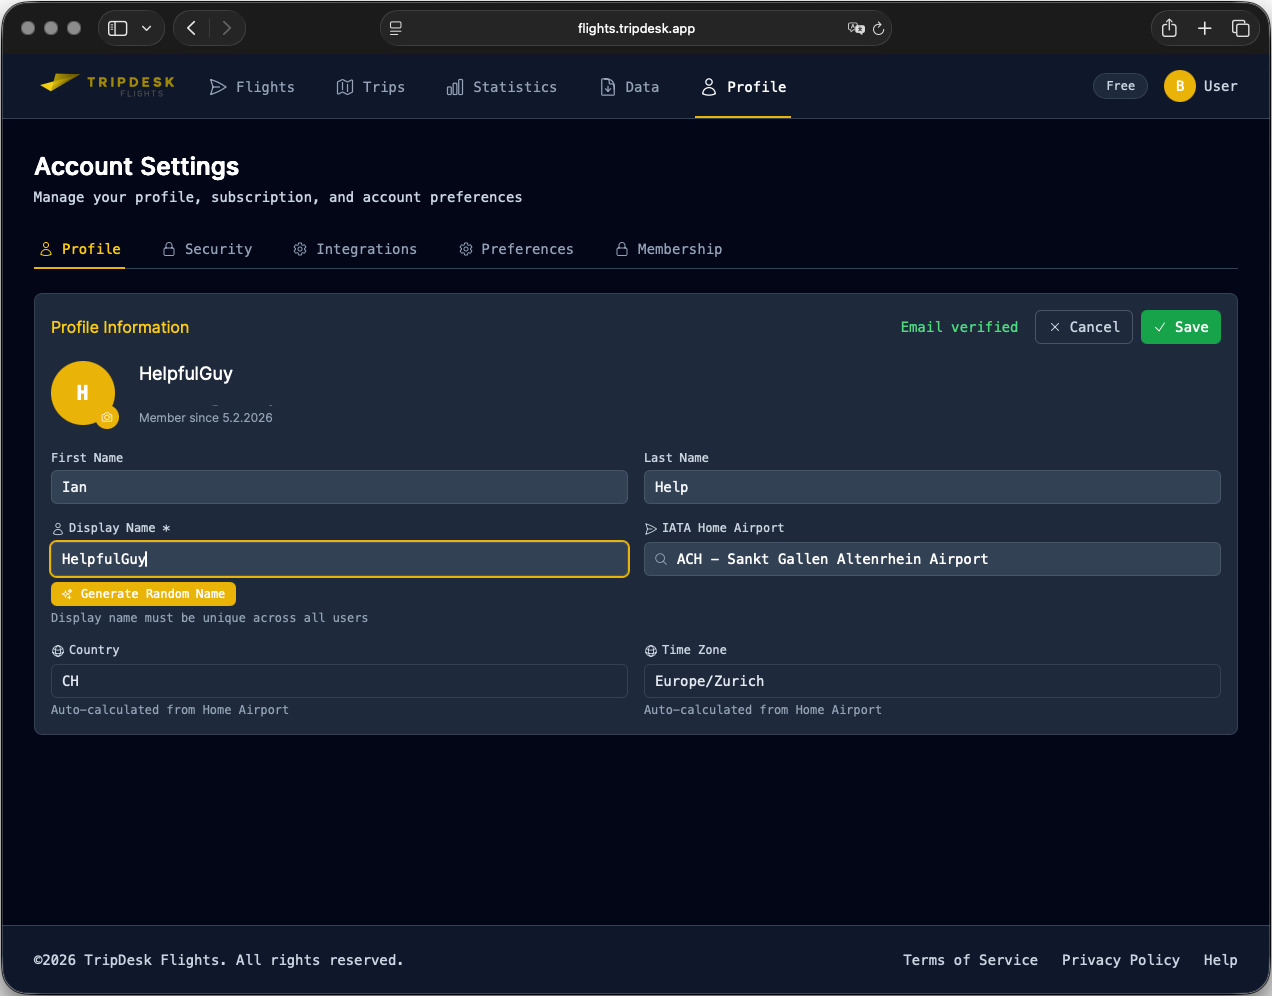
Choose a personal user name.
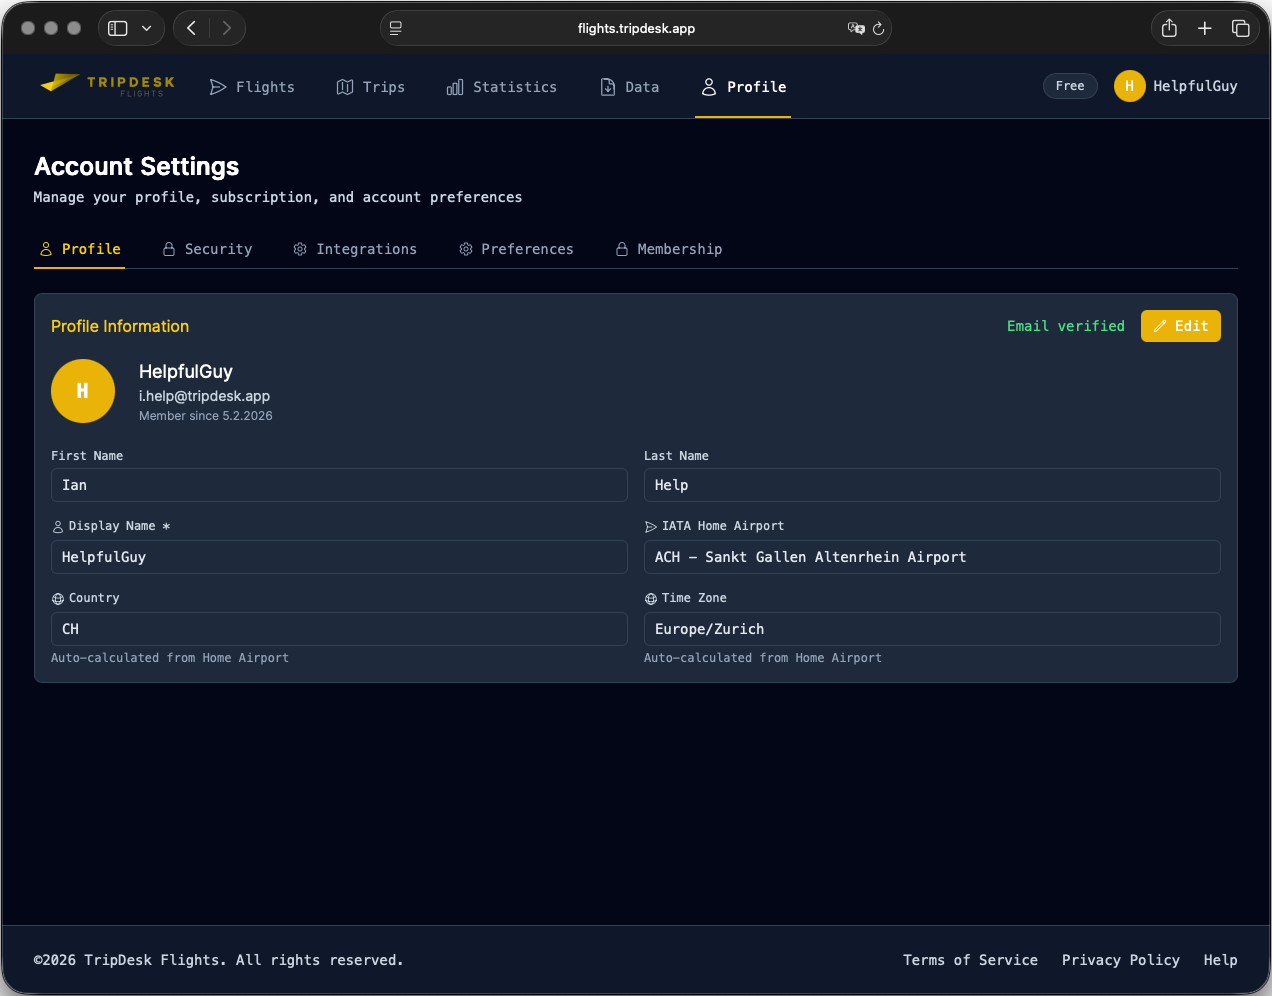
Save these settings.
2.3 Legacy Data Import
See Section 5.2 how to import your legacy data.
2.4 Login & Sessions
2.4.1 Login Options
Email & Password: Standard authentication
Remember Me: Extends session duration (configurable)
Session Management: View and manage active sessions
2.4.2 Session Security
Sessions are tied to your device and browser
IP address tracking for security monitoring
Automatic logout after inactivity
Manual session revocation available
2.4.3 Session Details
Device Information: Browser, operating system, device type
Location Data: IP address and approximate location
Activity Tracking: Last activity timestamp
Session Status: Online, away, or offline indicators
3 Trips and Flights
The data is organized by trips and flights (flight segments). Trips are optional.
3.1 Trips
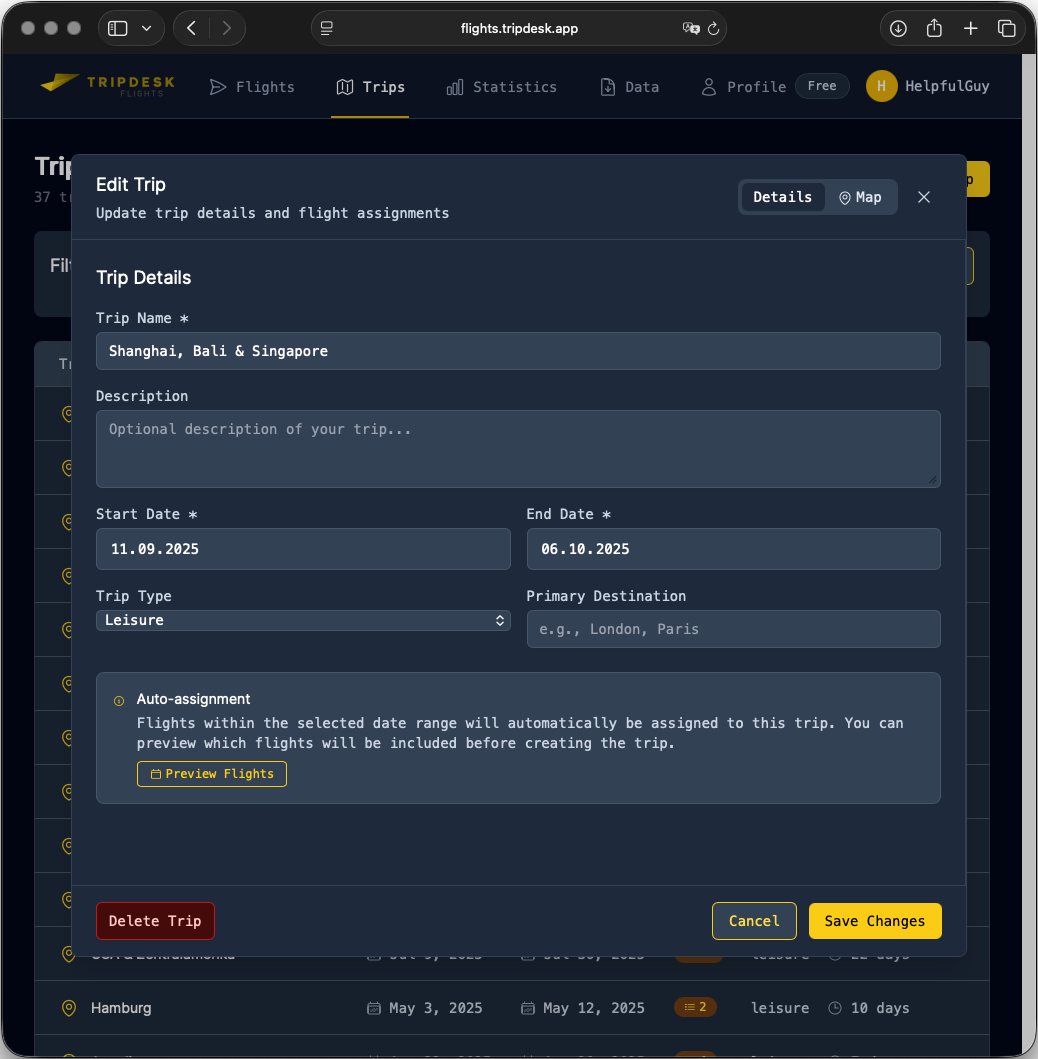
Trips are a bracket around one or more flight segments. A trip is defined by a time frame. All flights, that are within this time window will be assigned to this trip. The flight list, flights that are assigned to a trip have a yellow bar with the trip name on the lefthand side.
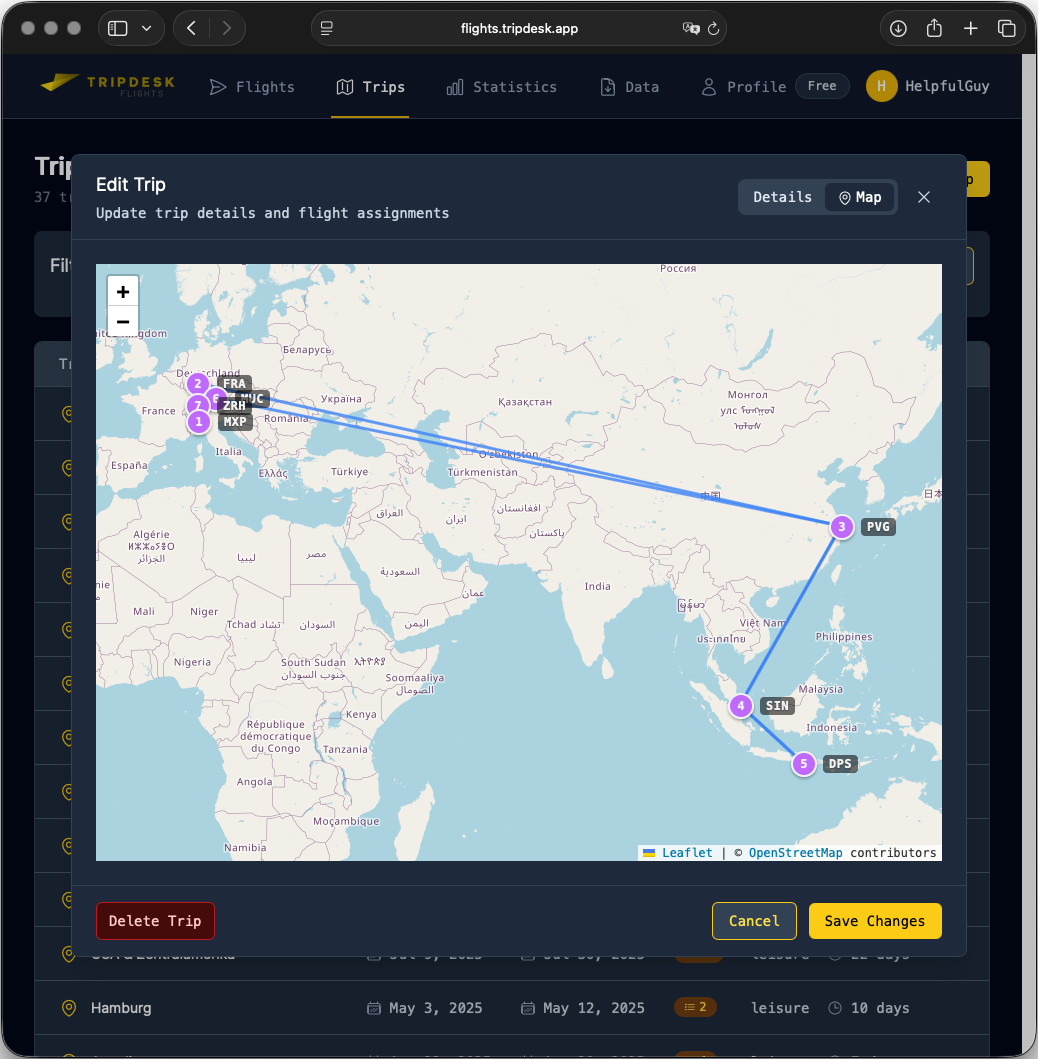
The route of that trip is displayed on a map.
Please note, if you have duplicate routes, only one is displayed (e.g. for the two flights SIN-PVG-DPS and DPS-PVG-SIN, only the first two legs are shown with numbers on the map).
3.2 Flights
The flights page lists all your flight segment. You can sort the list or filter for certain values.
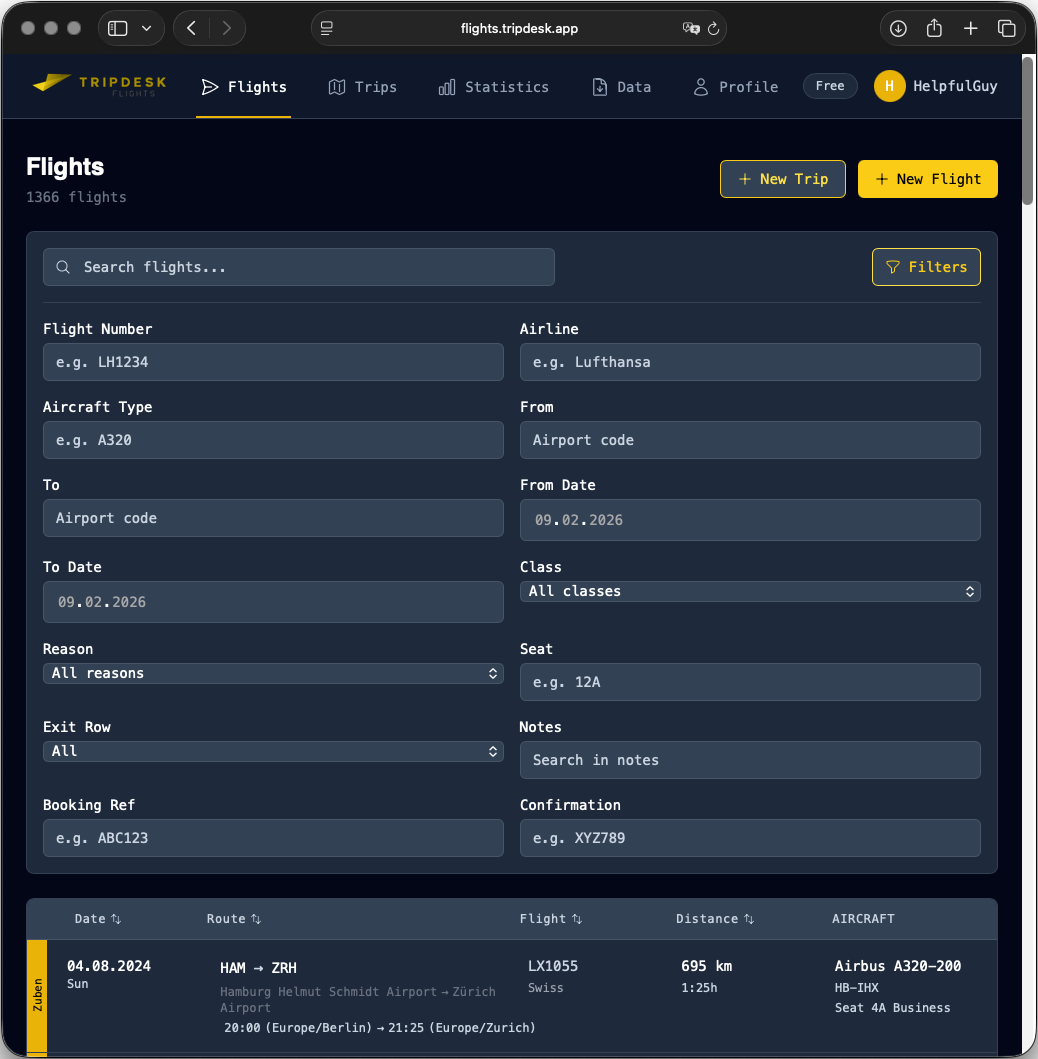
Click on one line to open the flight edit window.
3.3 Flight Data
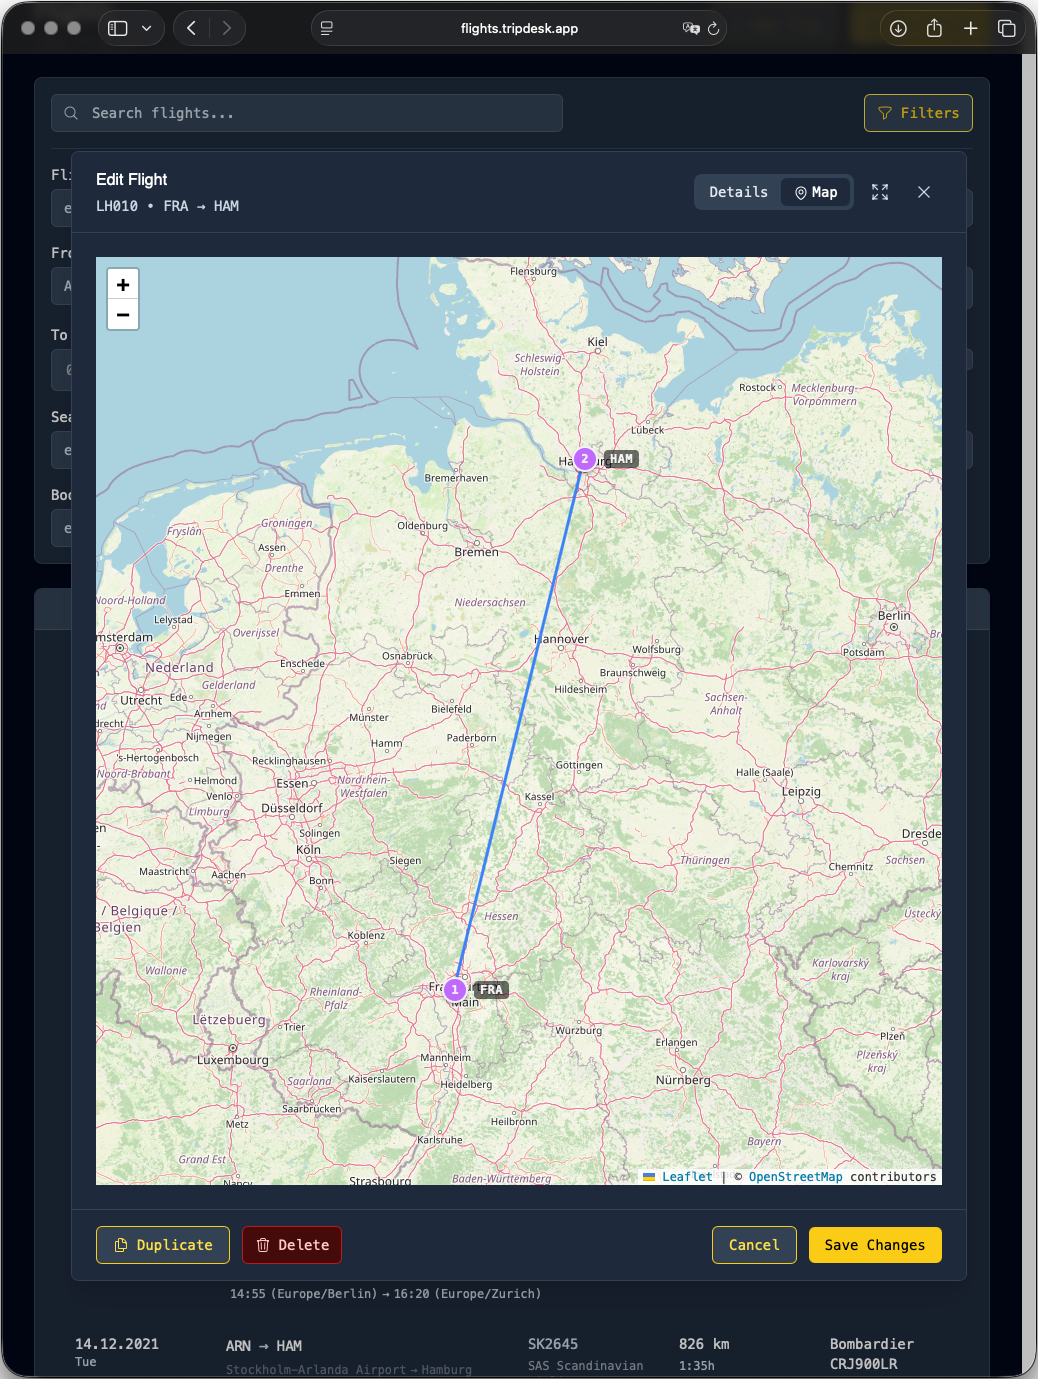
All flight details are editited in the flight edit window.
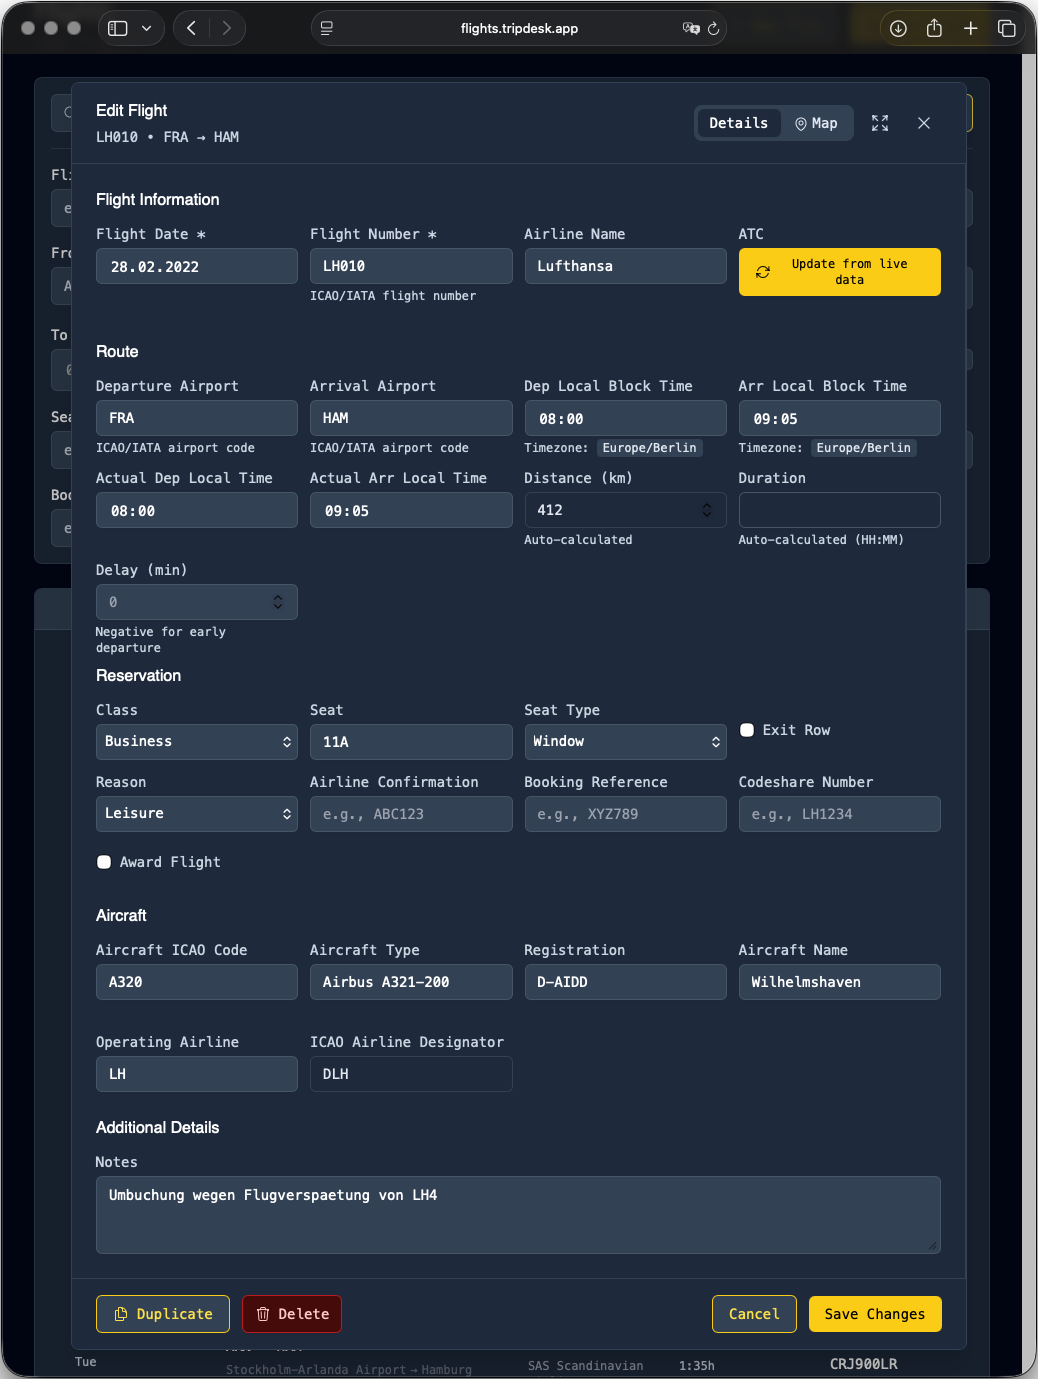
Click on the button in the upper righthand side to toggle the map display.
3.4 Live Update
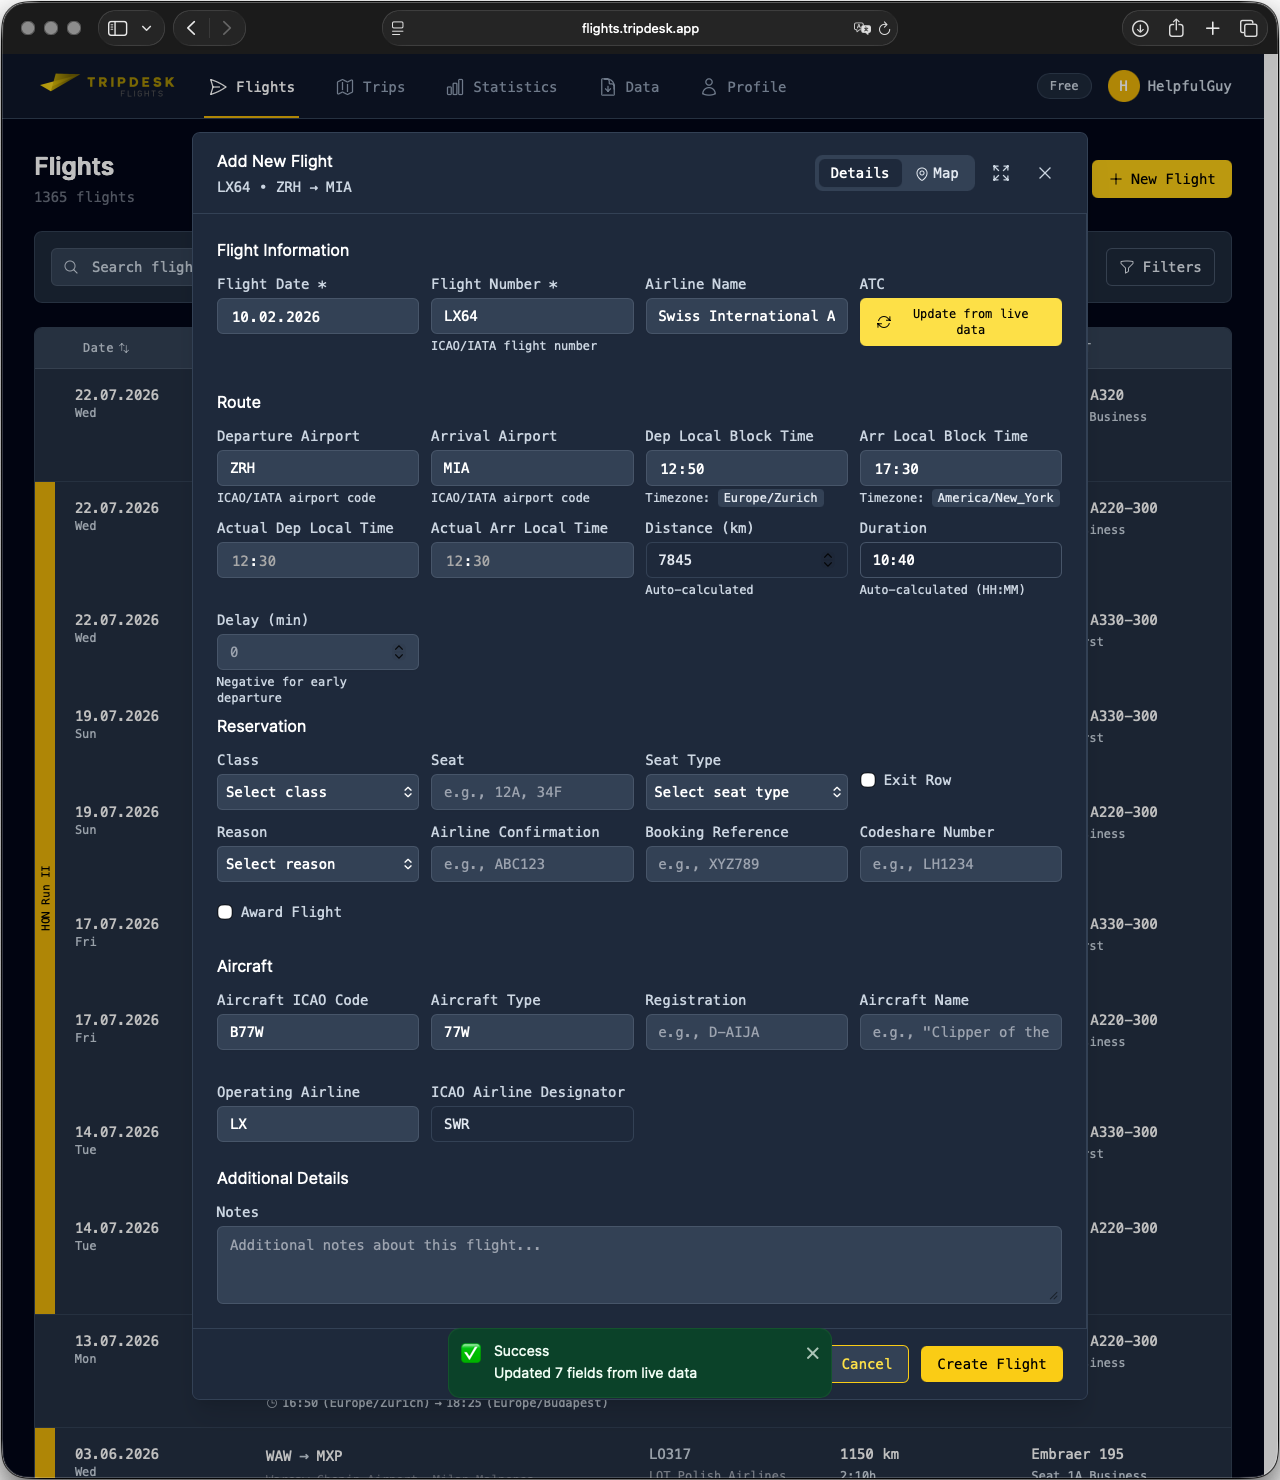
The button "Update from Live Data" enriches your data from live sources.
4 Statistics
4.1 Date Selection
Future: All flights from tomorrow to open end
This Year: All flights from beginning of the year to today
Last Year: All flights from beginning of last year to end of last year
Last 6 Months: All flights from this month and five months before
All Time: All flights
Custom Range: Choose range by date
4.2 Information
4.2.1 Overview
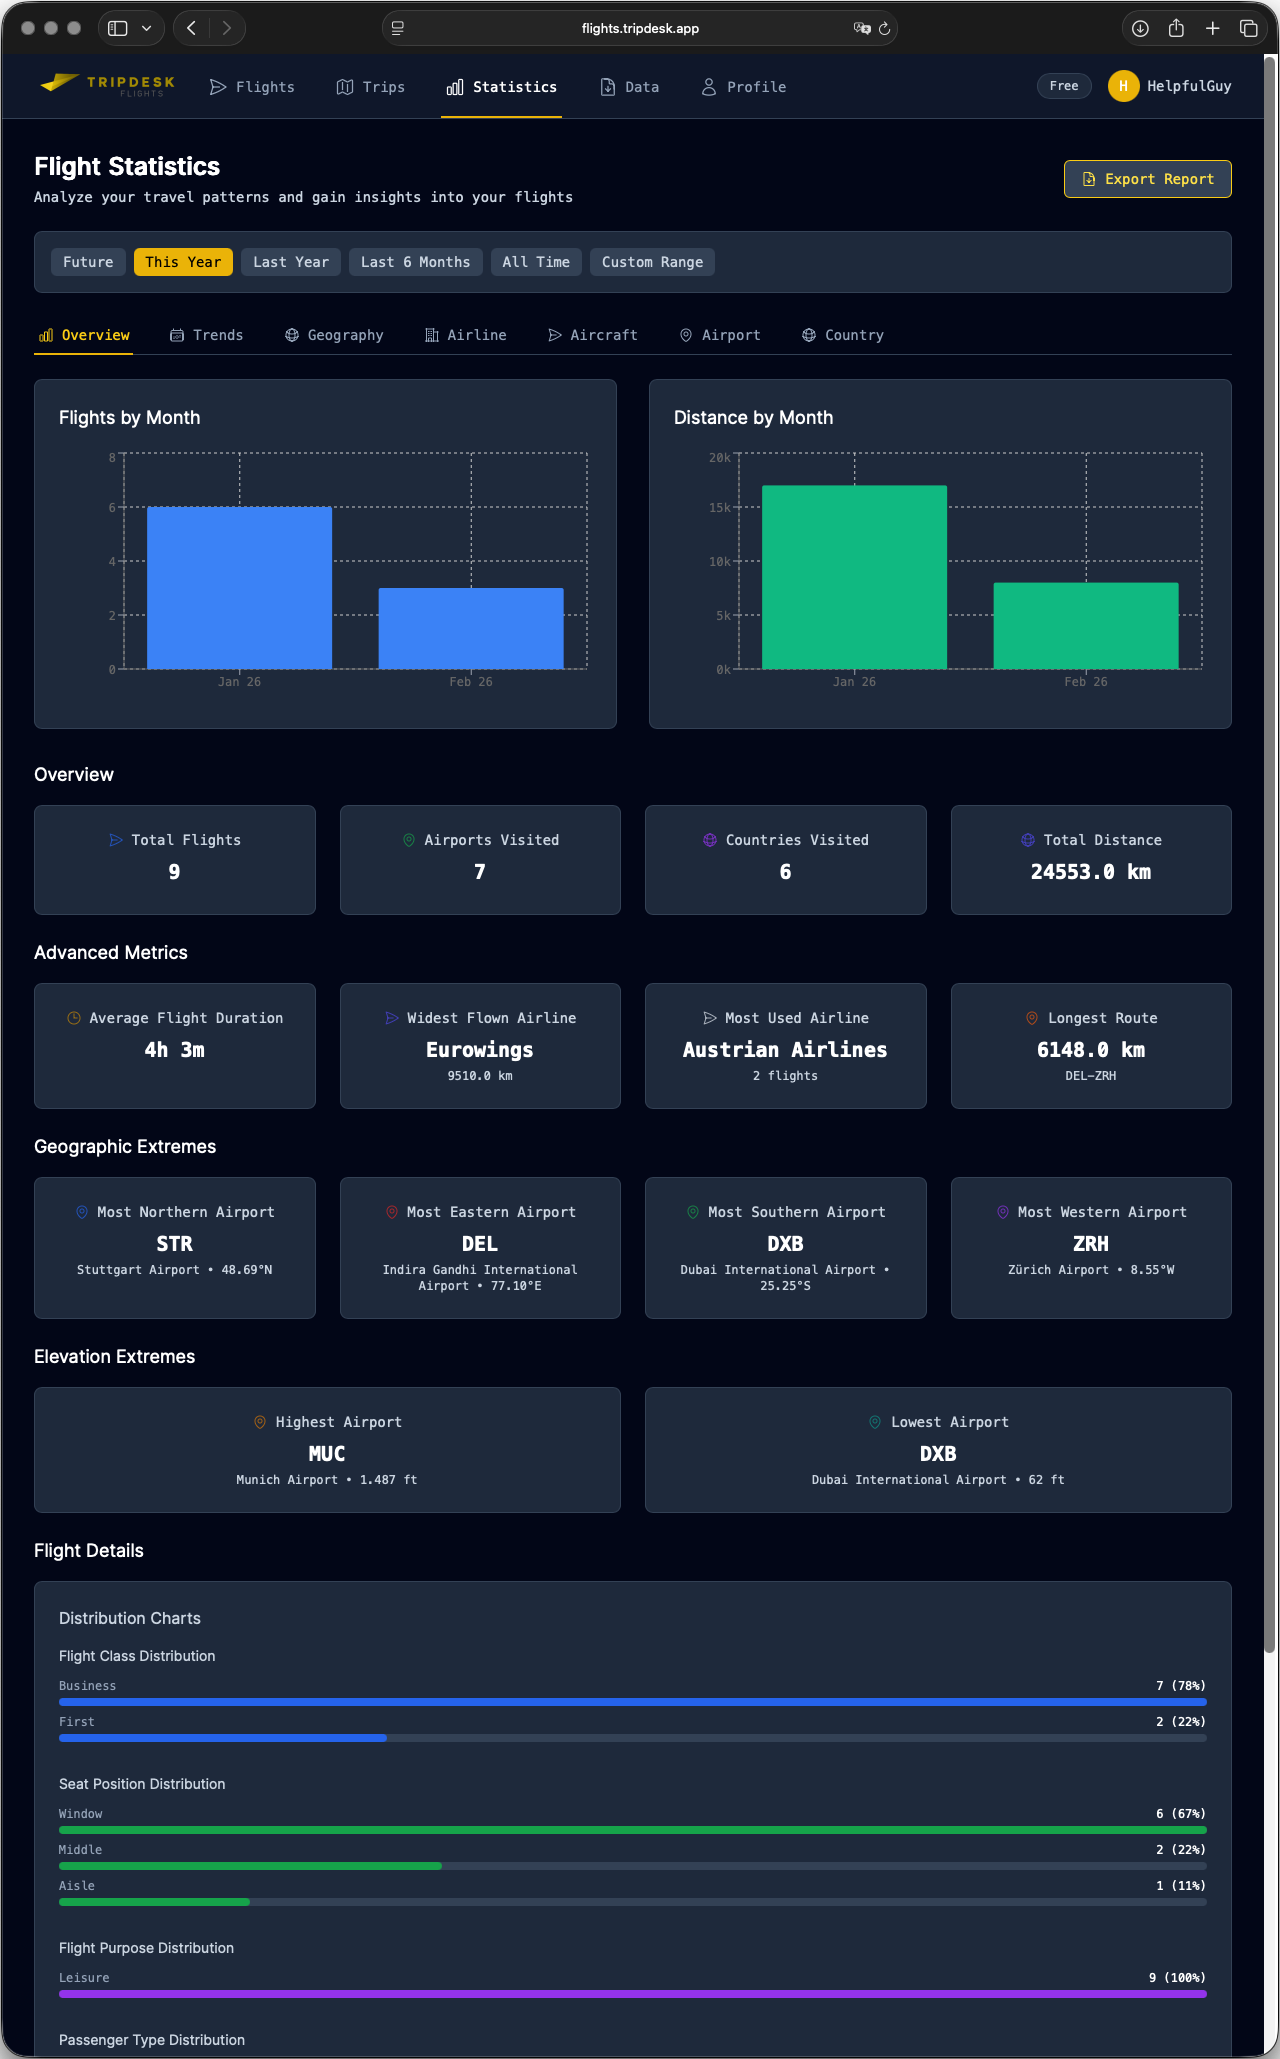
This is the overview dashboard. It contains general metrics based on the date selection.
4.2.2 Trends
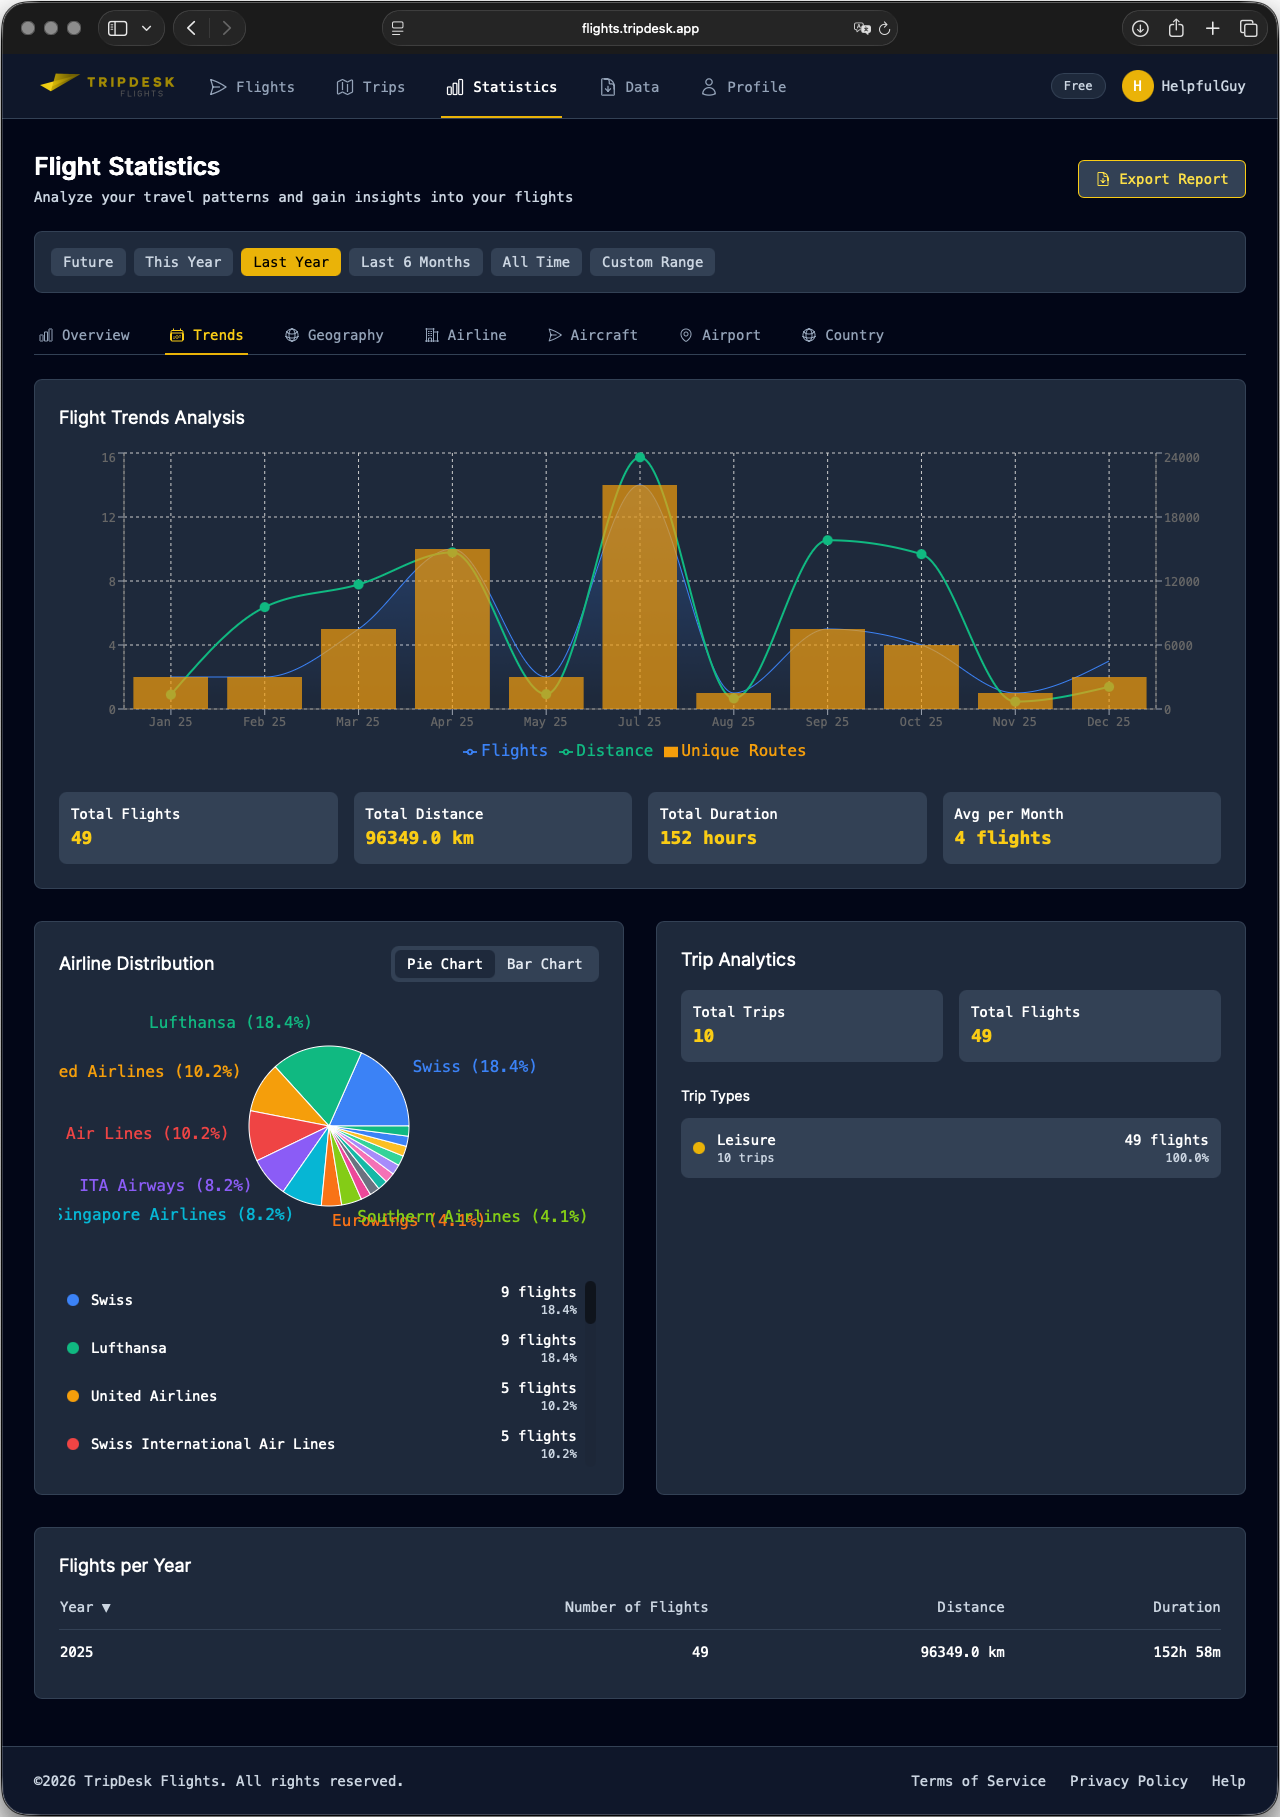
The trends page shows information about the selected flights distribution.
4.2.3 Geography
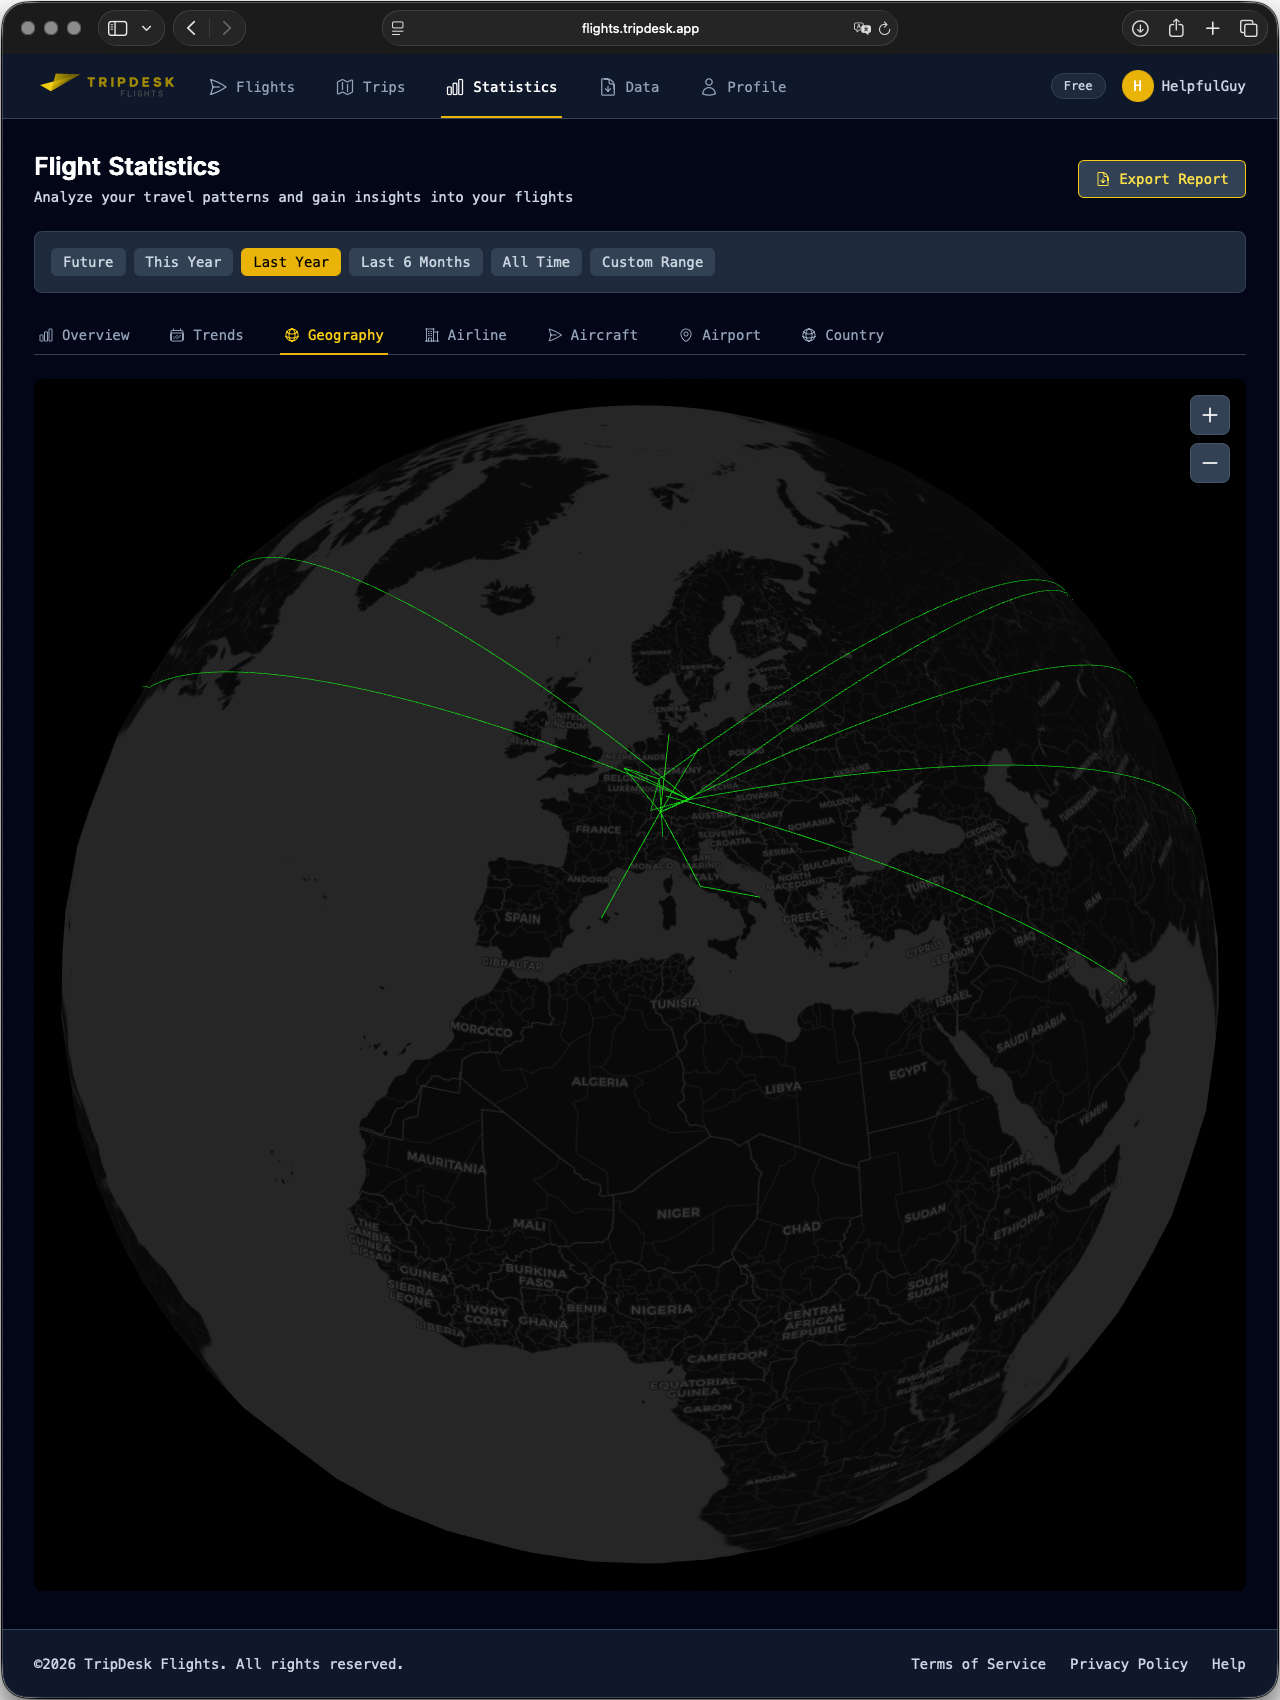
The geography page displays an interactive globe with all selected flight routes (green lines). The globe is controllable with your pointing device (e.g. mouse, trackpad, touch screen).
4.2.4 Airline
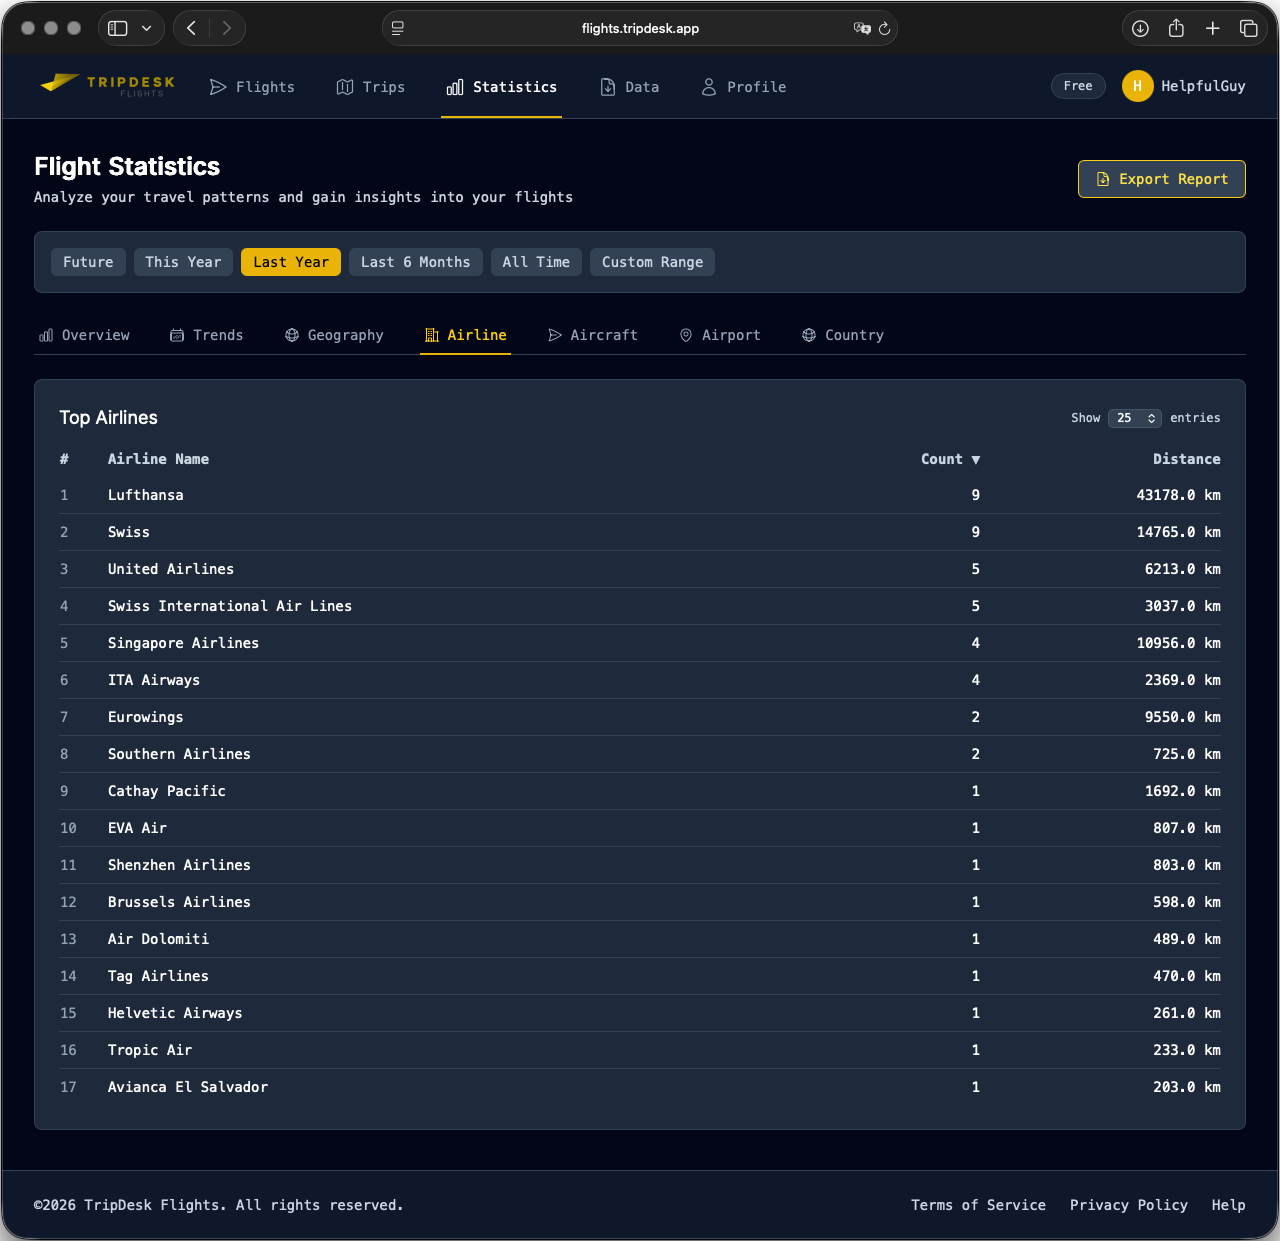
The airline page lists all selected airlines.
4.2.5 Aircraft
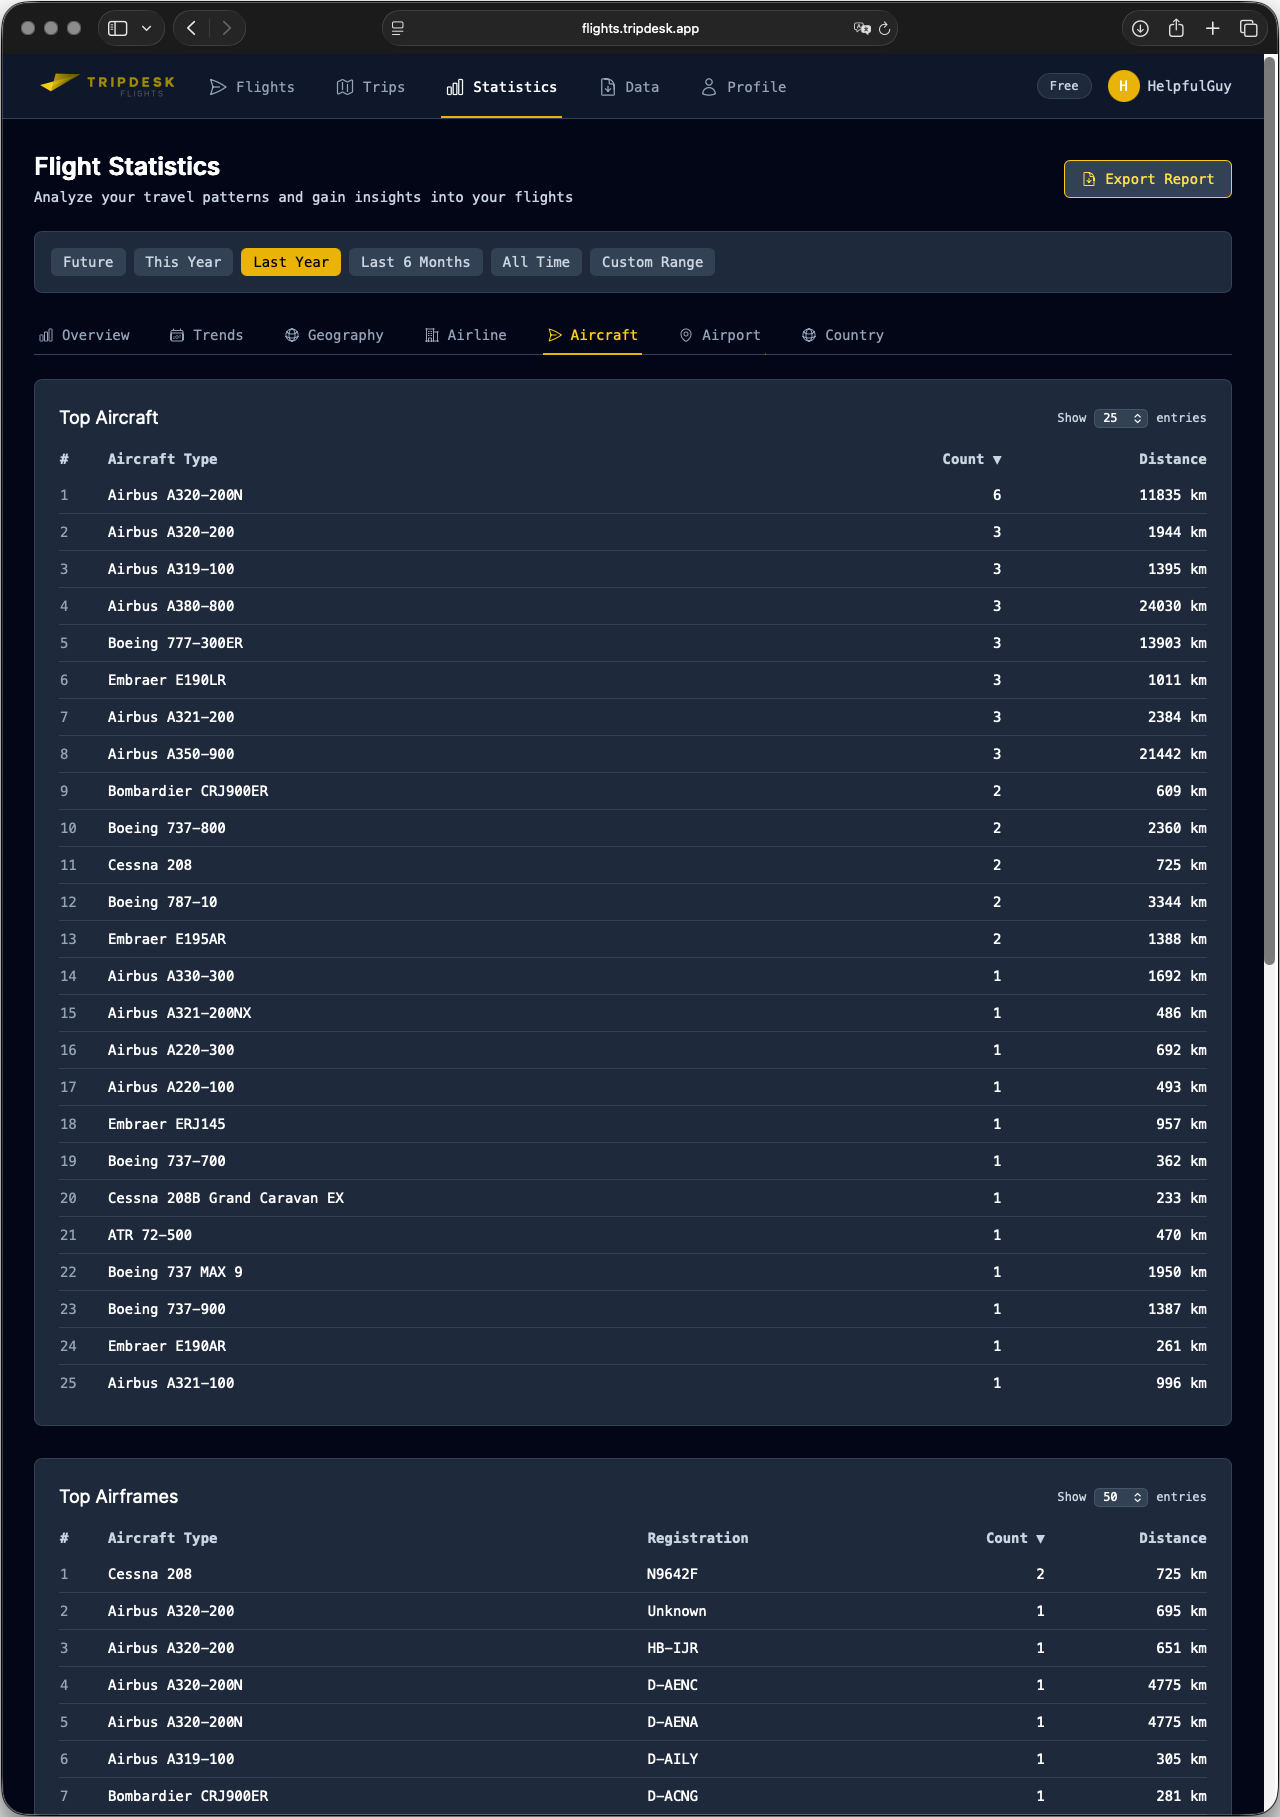
The airline page lists all selected aircraft by type (manufacturer and type) and by airframe registration.
4.2.6 Airport
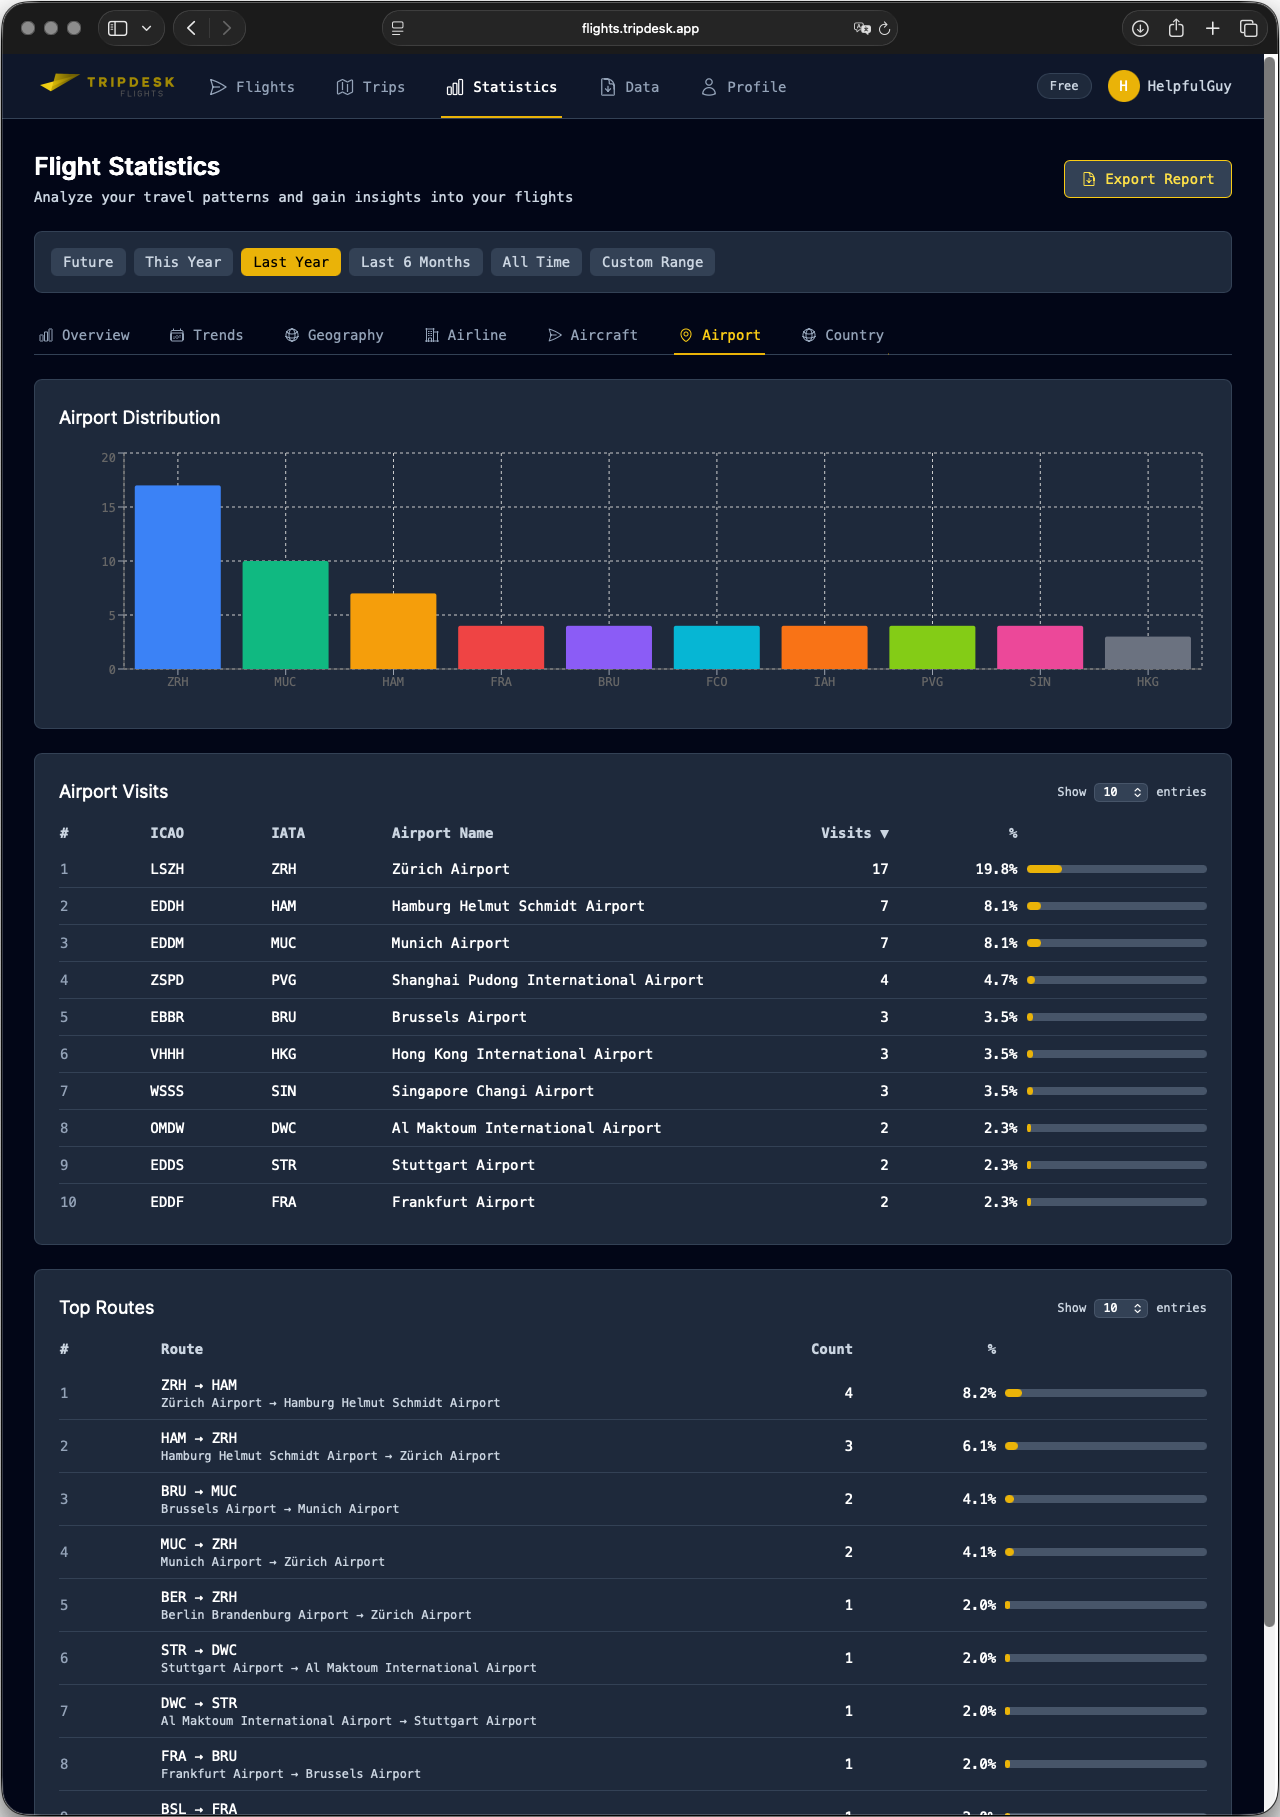
The airport page lists all visited airports and the appropriate routes, based on your date selection.
4.2.7 Country
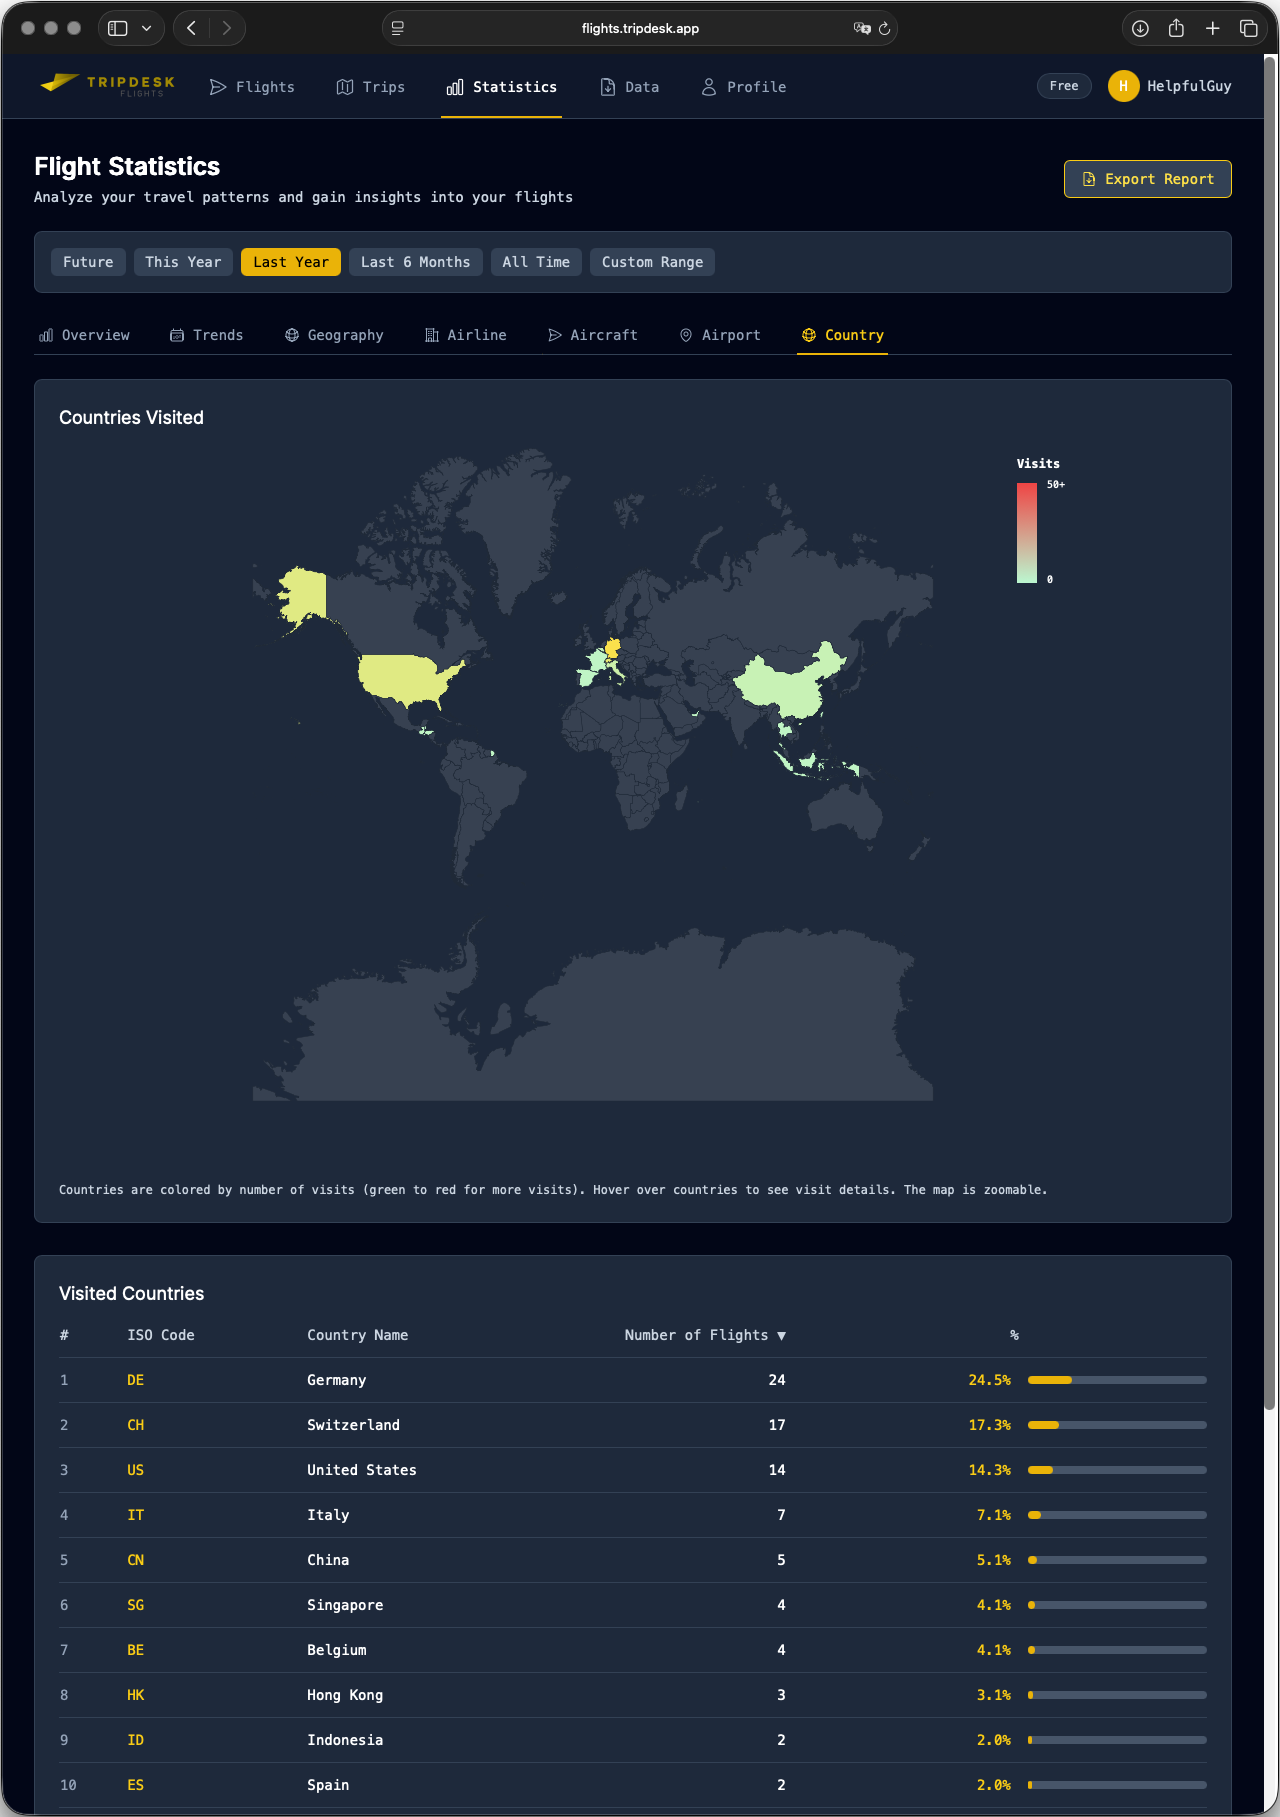
The country page shows a map of all visited countries. The color will fade to red, the more often the airport was visited. The data is also shown in list format.
5 Data Management
5.1 Changed Values
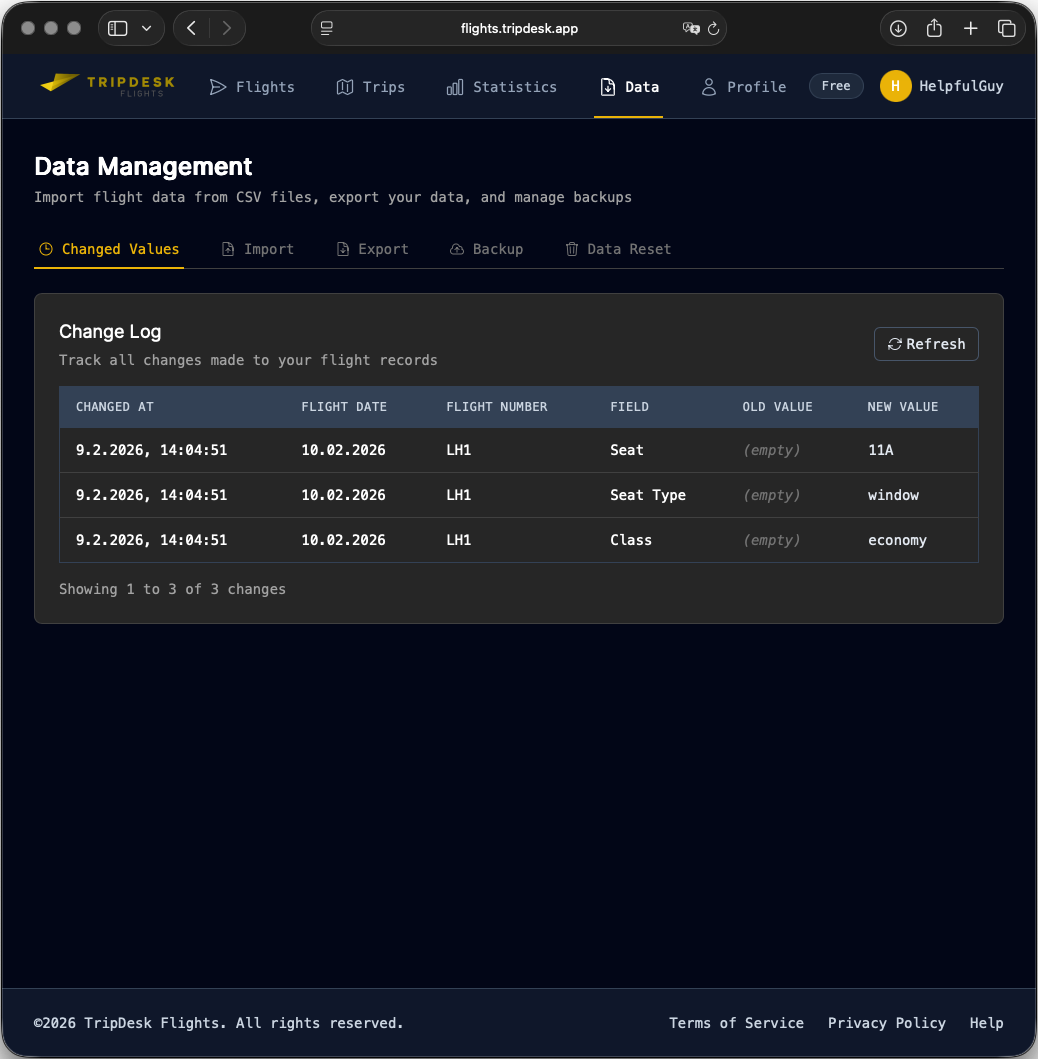
Whenever data in your flight segments is modified (not created), the changed values are logged and shown on this page.
5.2 Import
(1) flugstatistik.de and flightmemeory.com
(2) openflights.org
(3) flighty.app
Please note: Only flight segments are subject to this import feature. Trips must be transferred manually, if any exist.
- flugstatistik.de and flightmemeory.com
Send a message to Heret Informatik Service via their contact form. Typically you will get a data dump sent in return by email within a few business days. - openflights.org
Go to settings page and click Backup to CSV. A file will be downloaded directly. - flighty.app
Click on your profile photo and click Settings. Scroll to Account data and click it. Click on Export your Flights. A file will be downloaded directly.
Migration Process:
Prepare Your Data: Export from your current platform (preferably in CSV format)
Use Import Wizard: Guided import with validation
Review & Correct: Fix any issues before final import
Verify Results: Check imported data for accuracy
Open the import page.
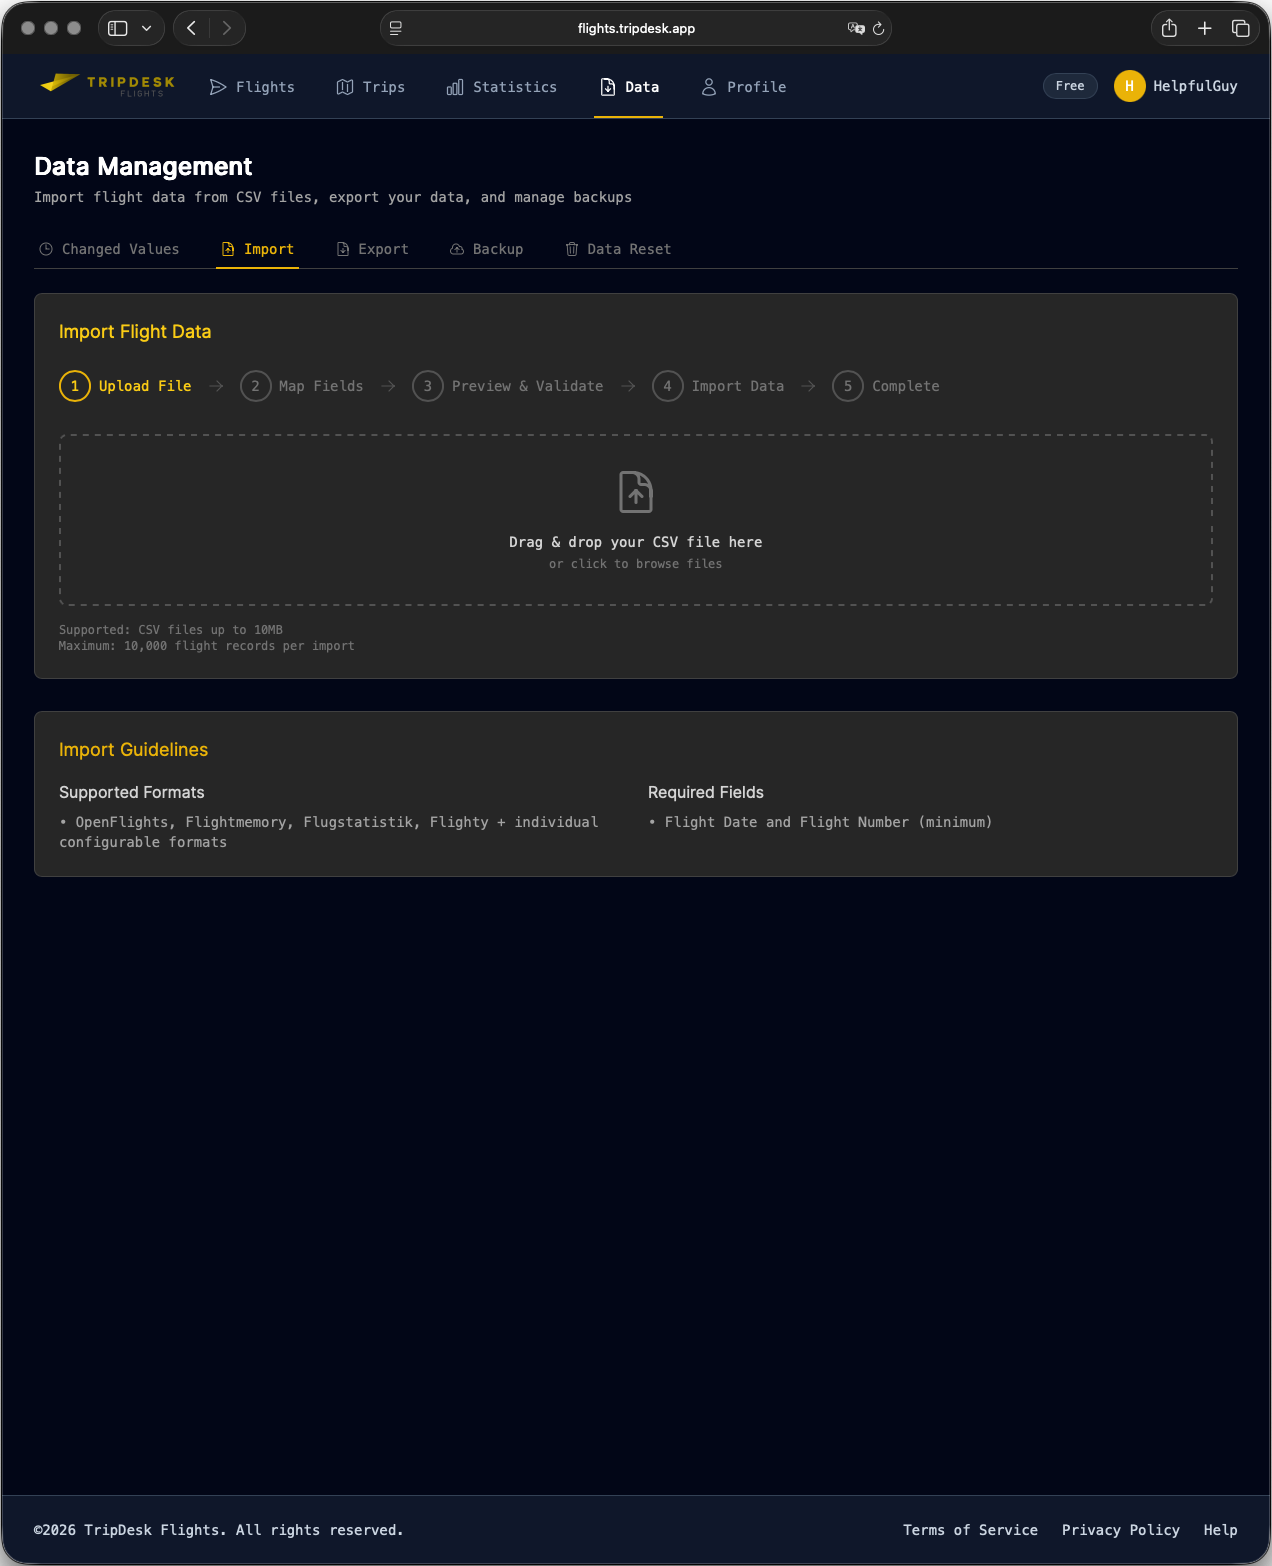
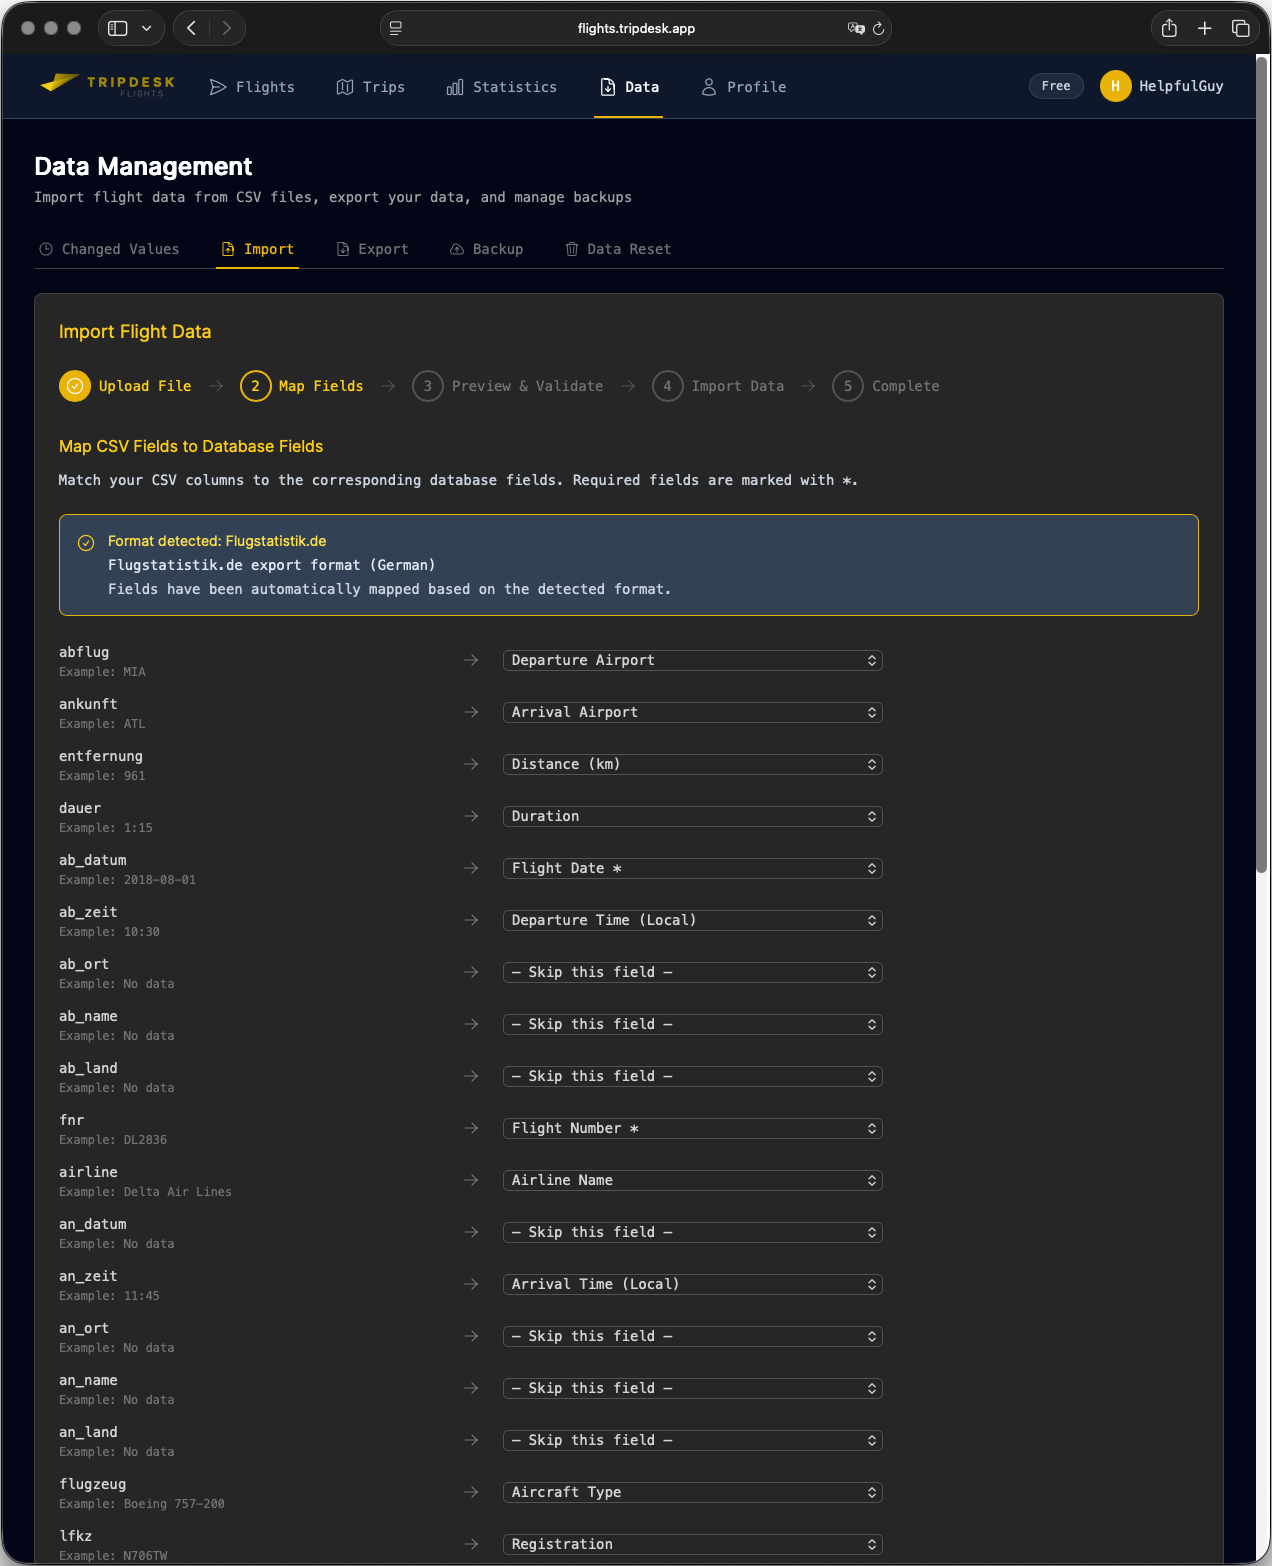
Upload your file. A mapping page will appear. If the format was recognized, all necessary fields will be mapped already. Feel free to do adjustments.
Multiple identical flight numbers are allowed per day (e.g. direct flights with stops under same flight number).
Check the pre-processed data. You may download the issues for further investigation.
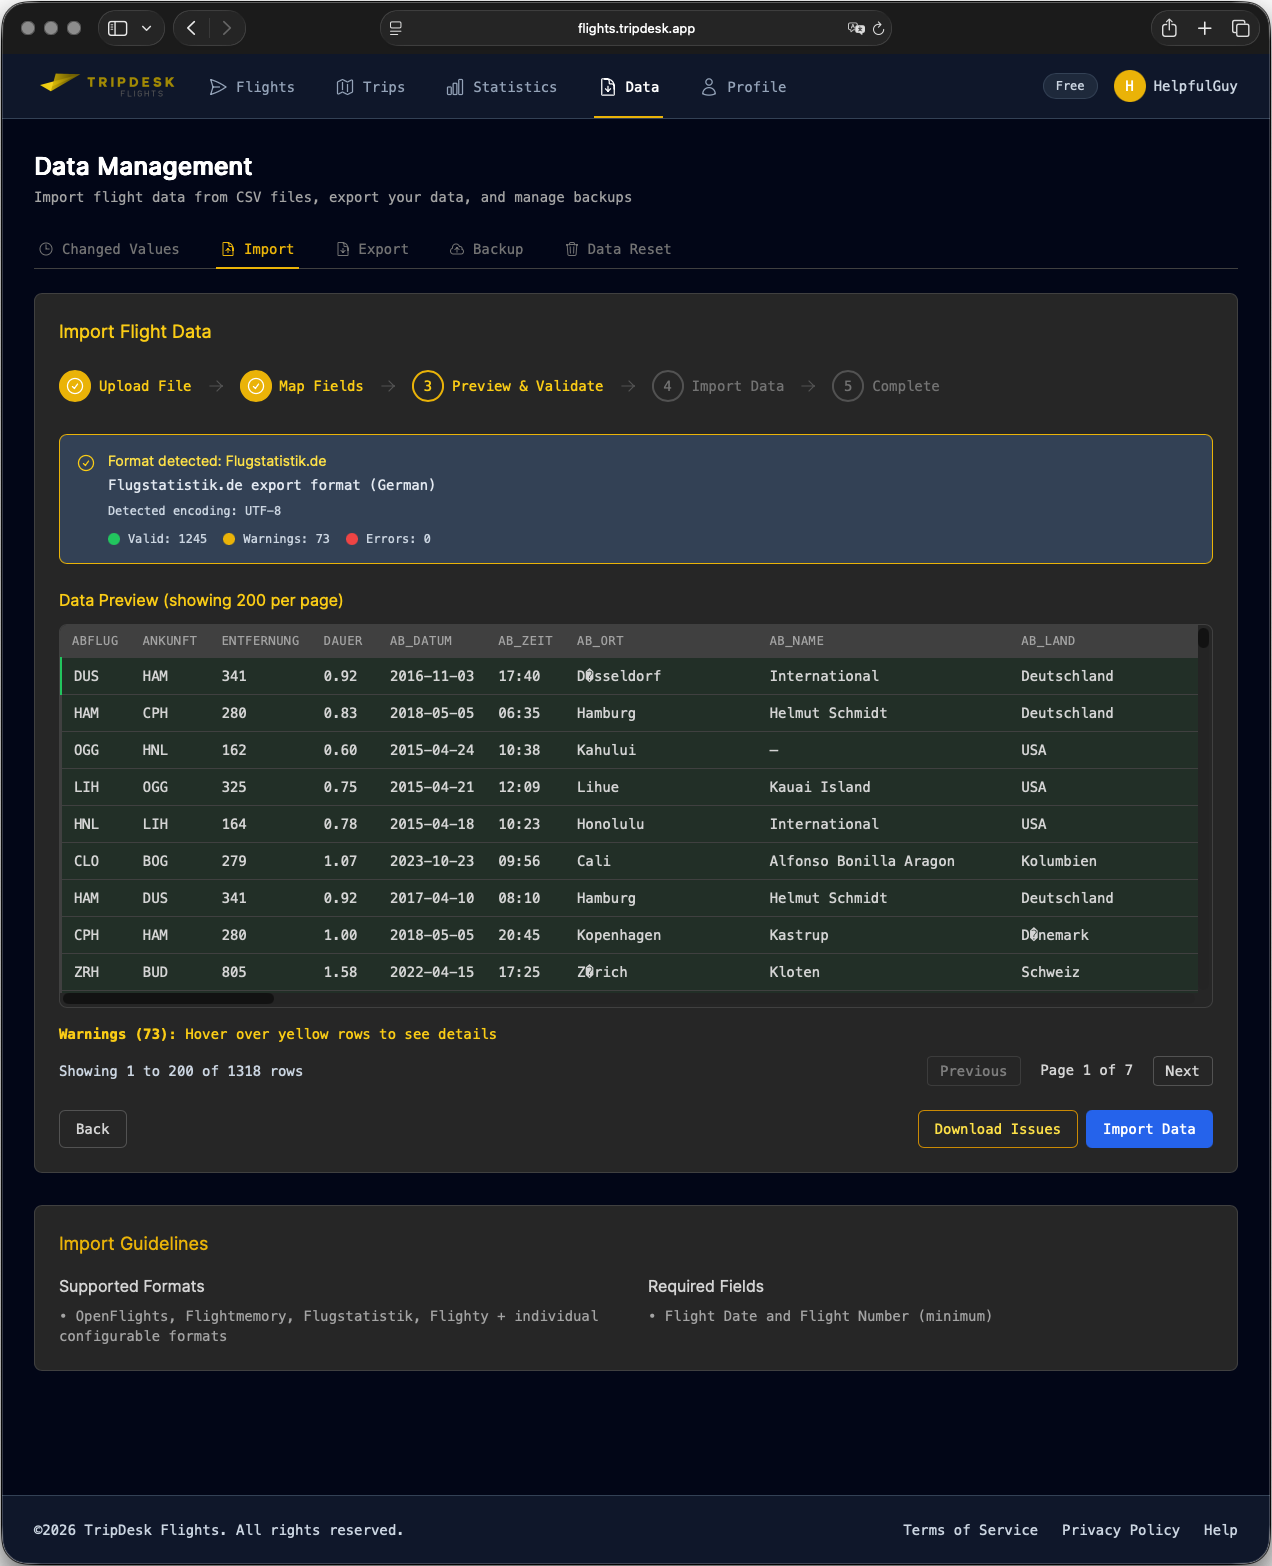
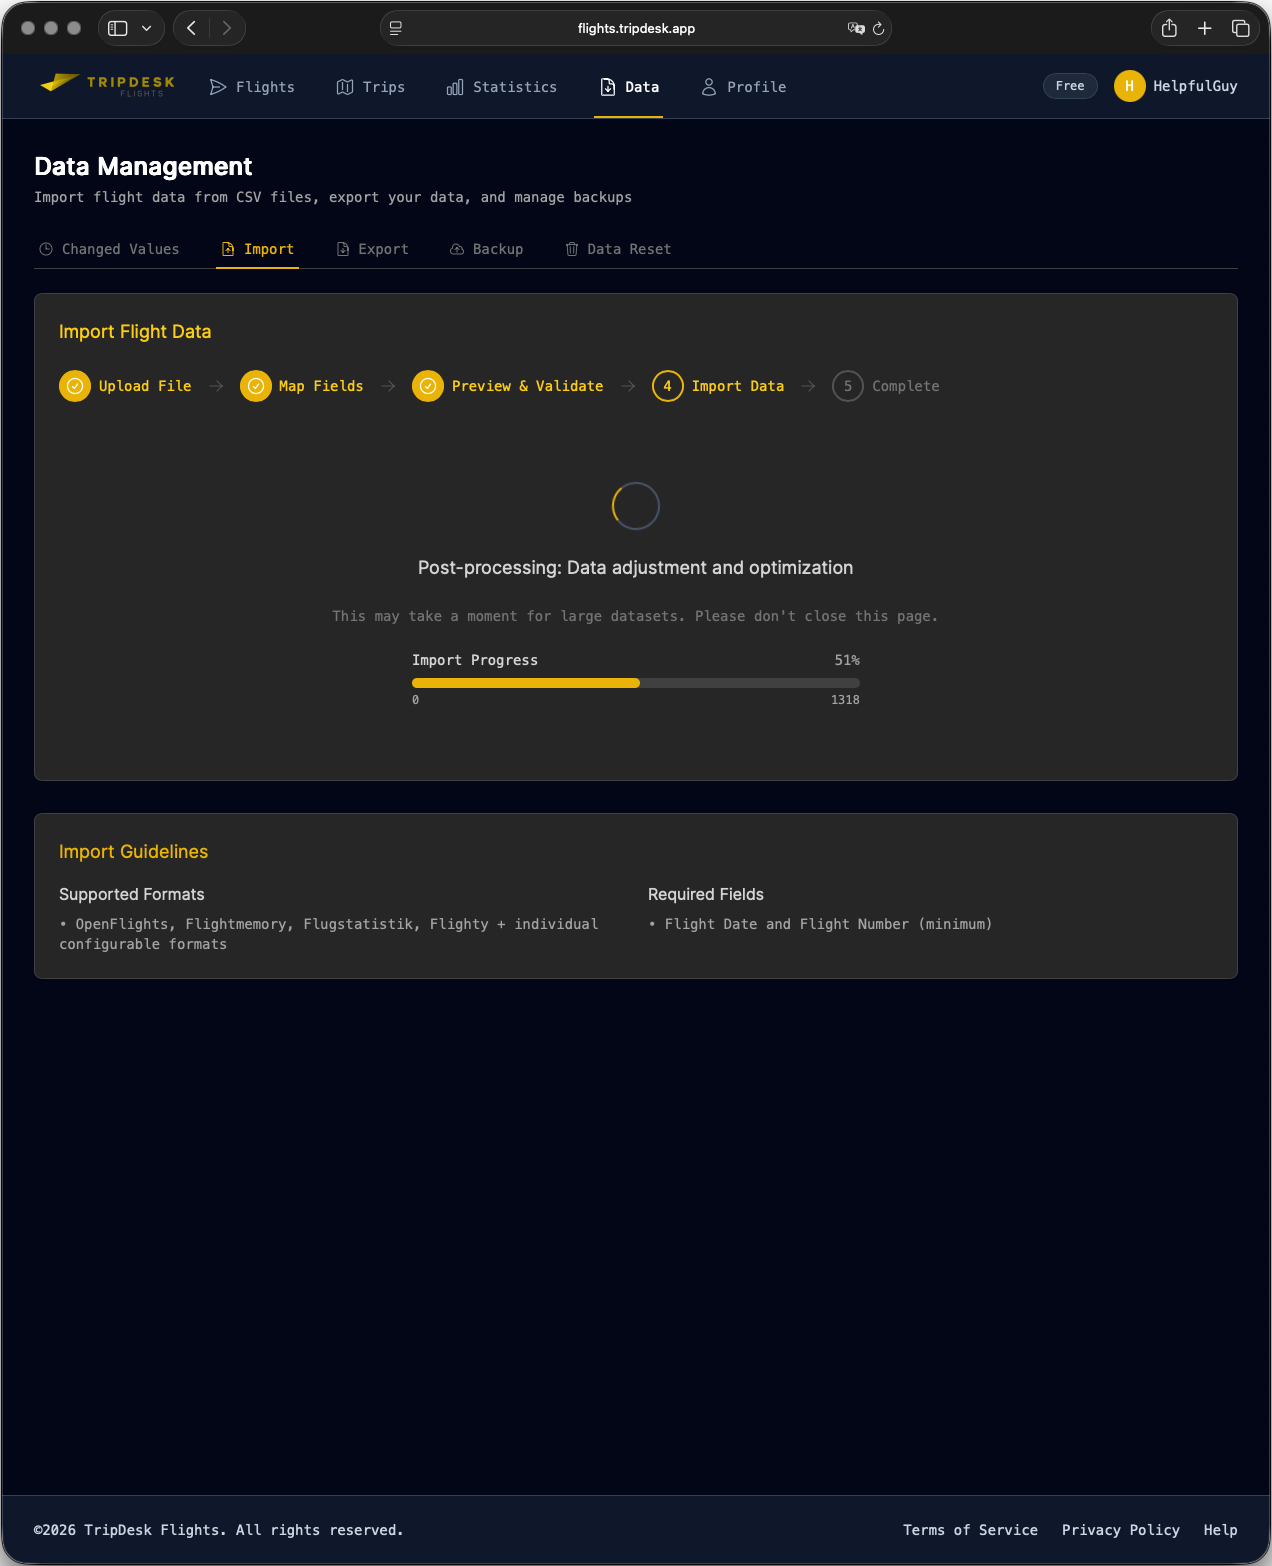
Do not leave the import page after the import has started until the process is displayed as finished.
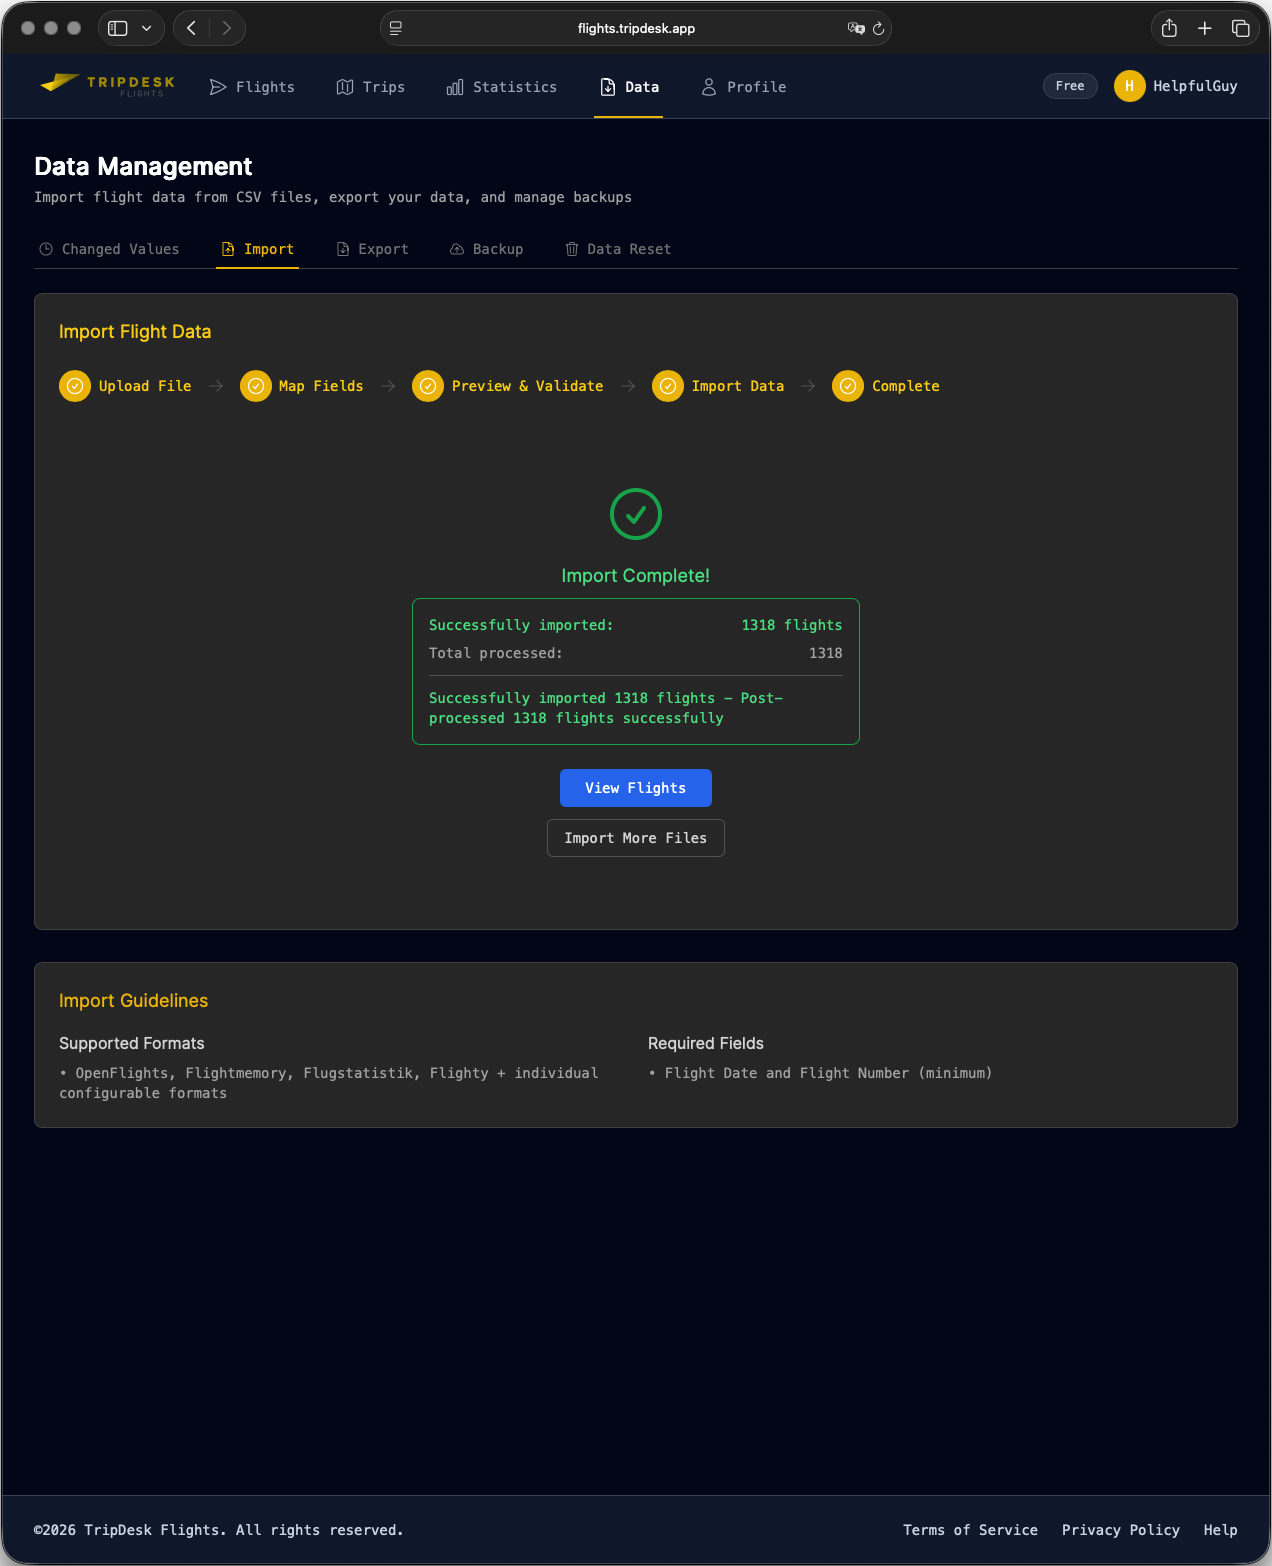
After the import is finished you may head for the flights page to check the result.
5.3 Export
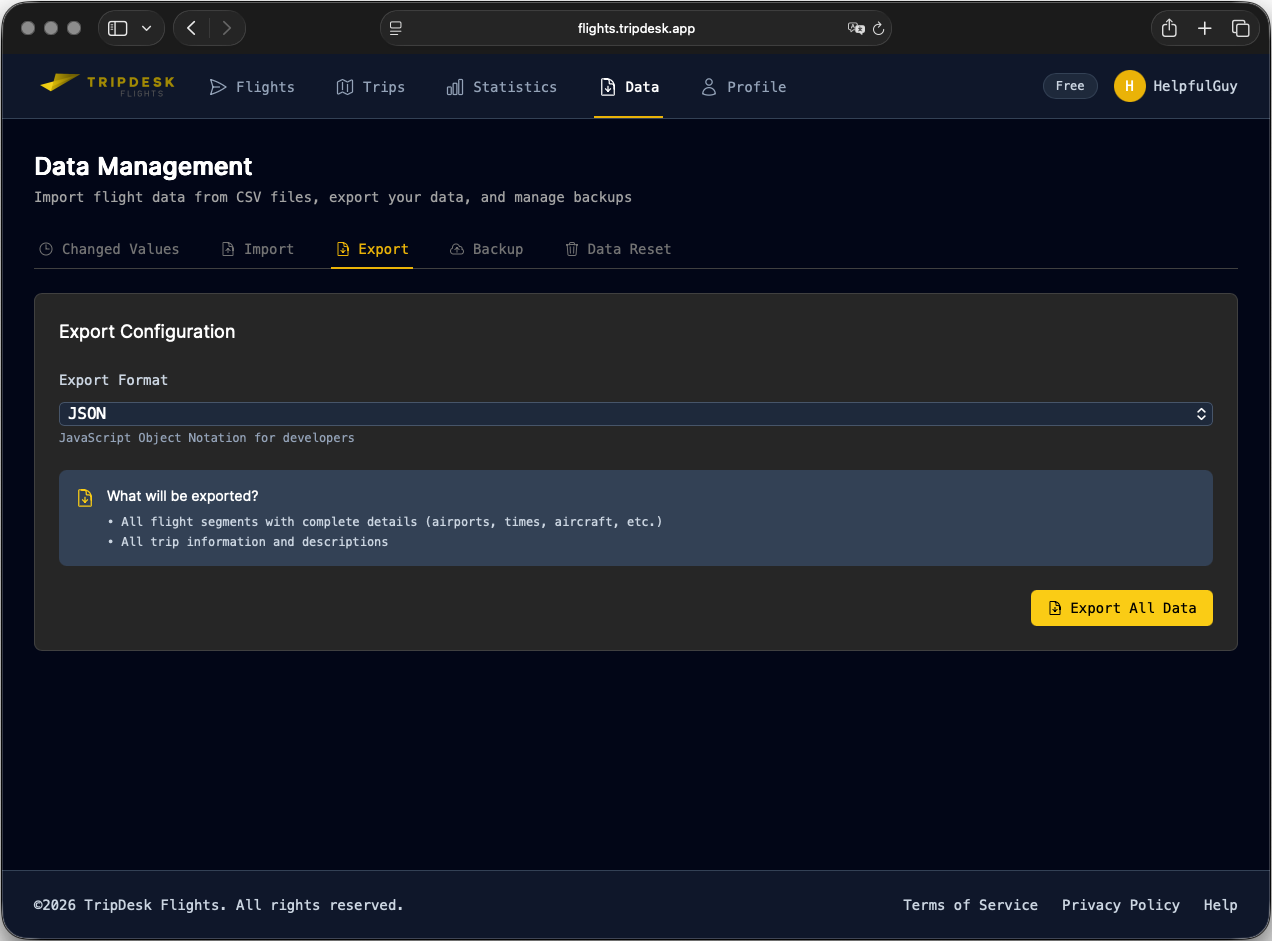
Exports are possible in CSV or JSON format. All stored records are downloaded in a file to you local computer.
5.4 Backup
It is recommended to regularly backup your trip and flight data. The data will be downloaded in a zip file to your local computer.
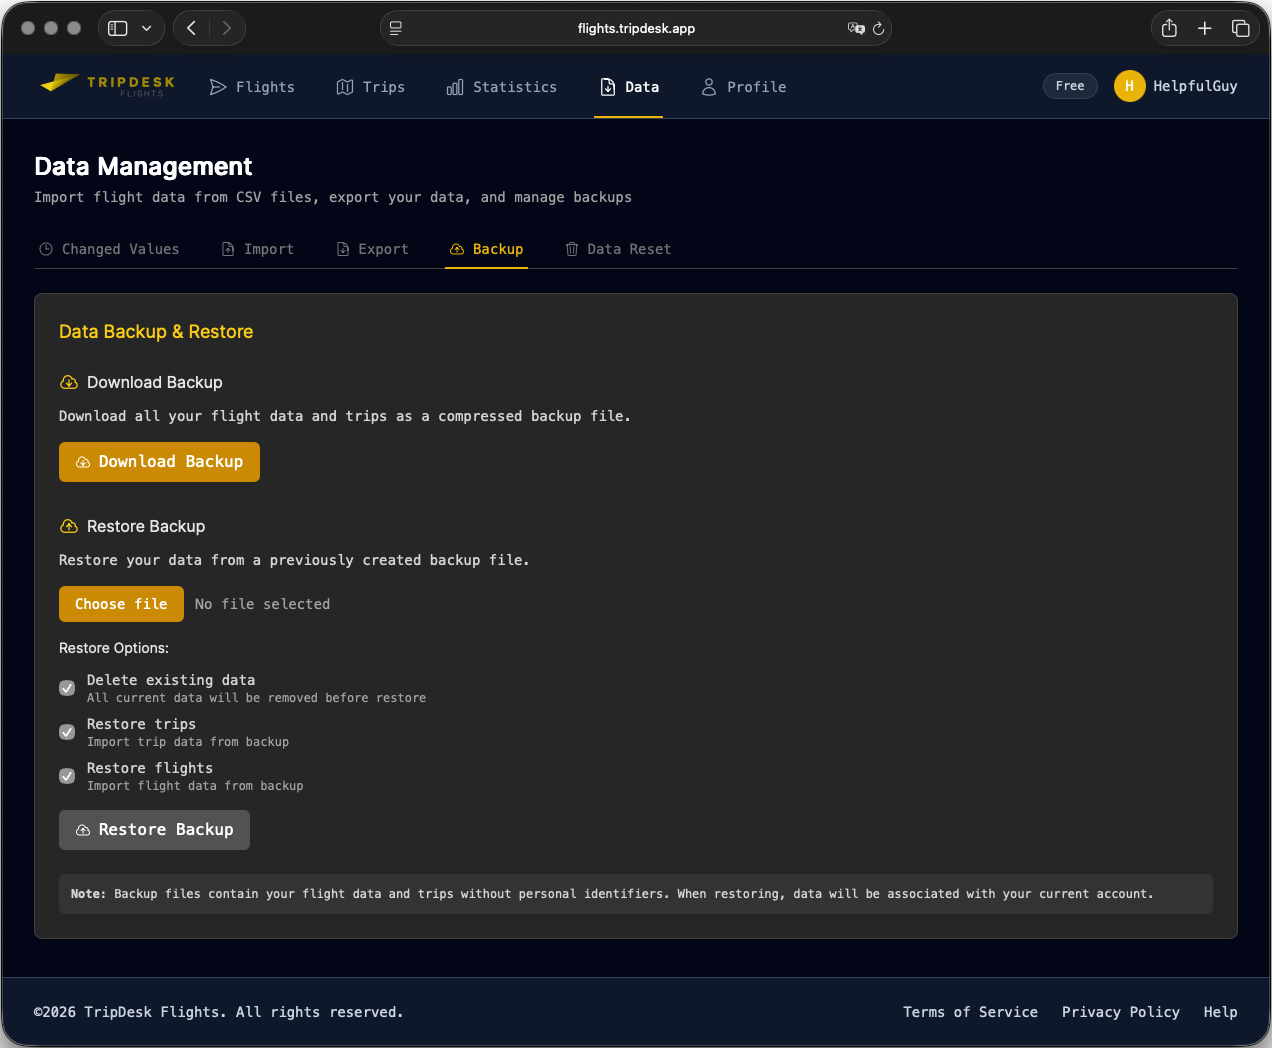
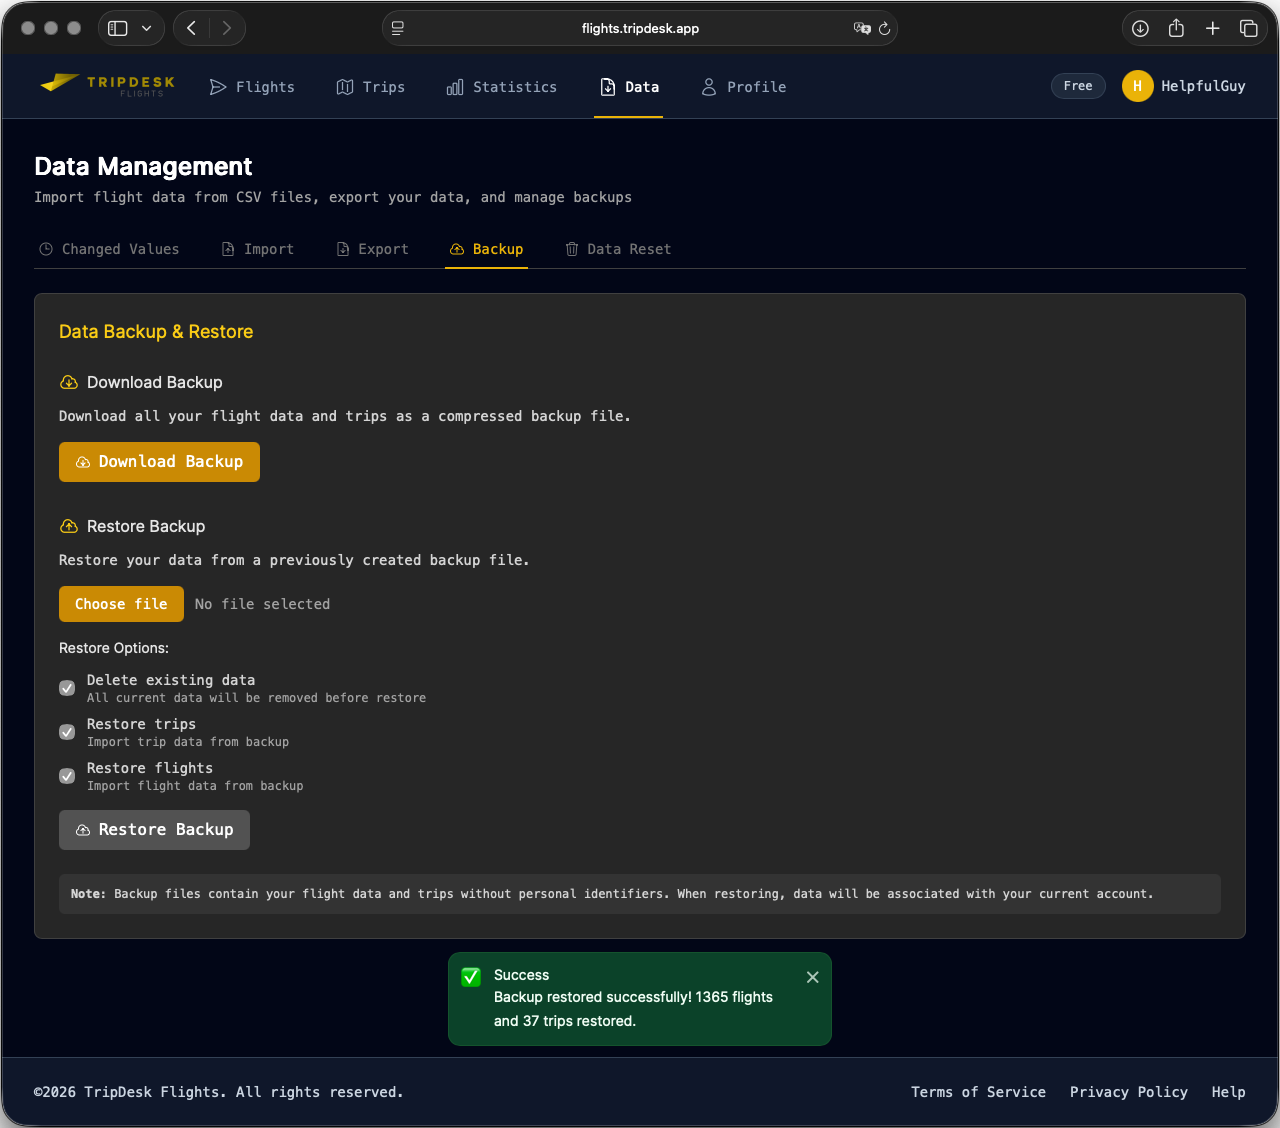
You restore your data in the same way. Check if your existing data should be deleted (default, unless you want a delta import). Also check, if trips only or trips and flight segments should be imported.
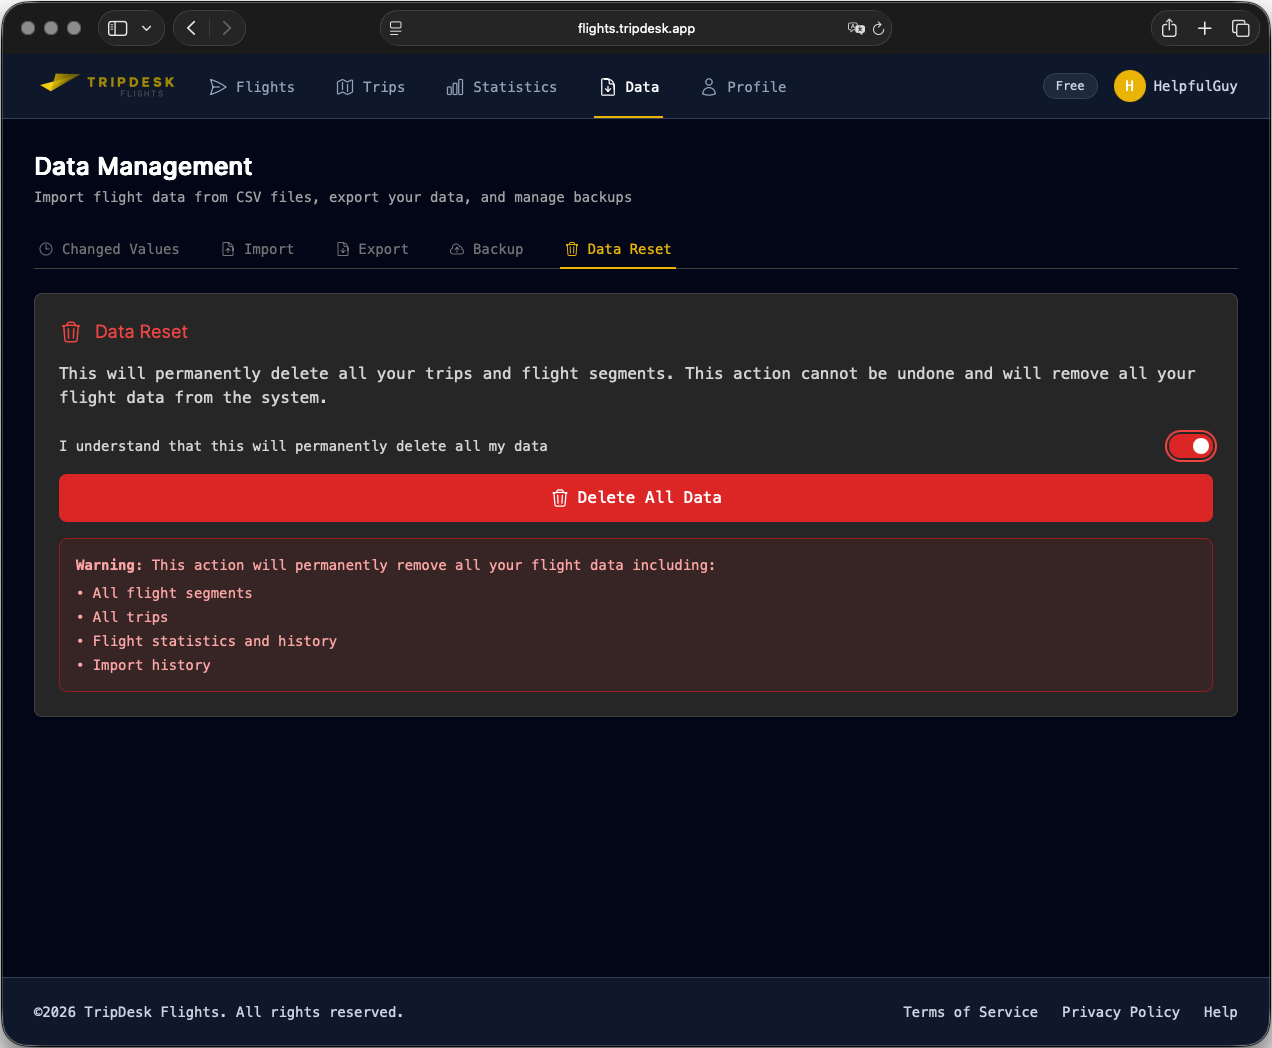
5.5 Data Reset
Caution: This resets all you stored trips and flight segments. Only your user account will remain.
6 Profile Settings
6.1 Profile
See Section 2.2 for setting your profile data.
6.2 Security
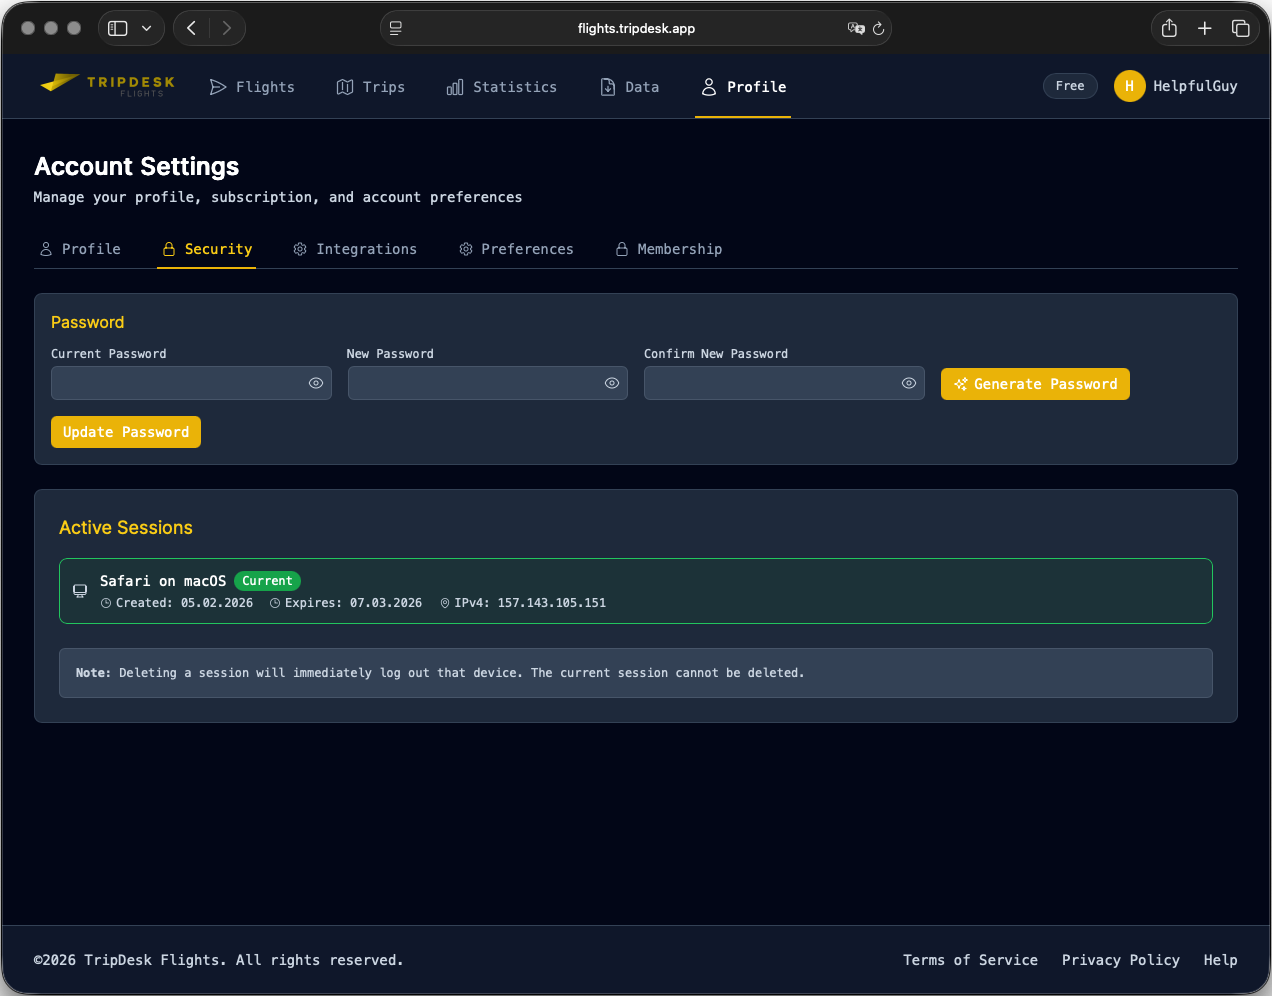
Change your password on the security page.
Here you can also see your current sessions and delete specific sessions. The session details indicate which device and network you were last logged into.
6.3 Integrations
6.3.1 Konfiguration
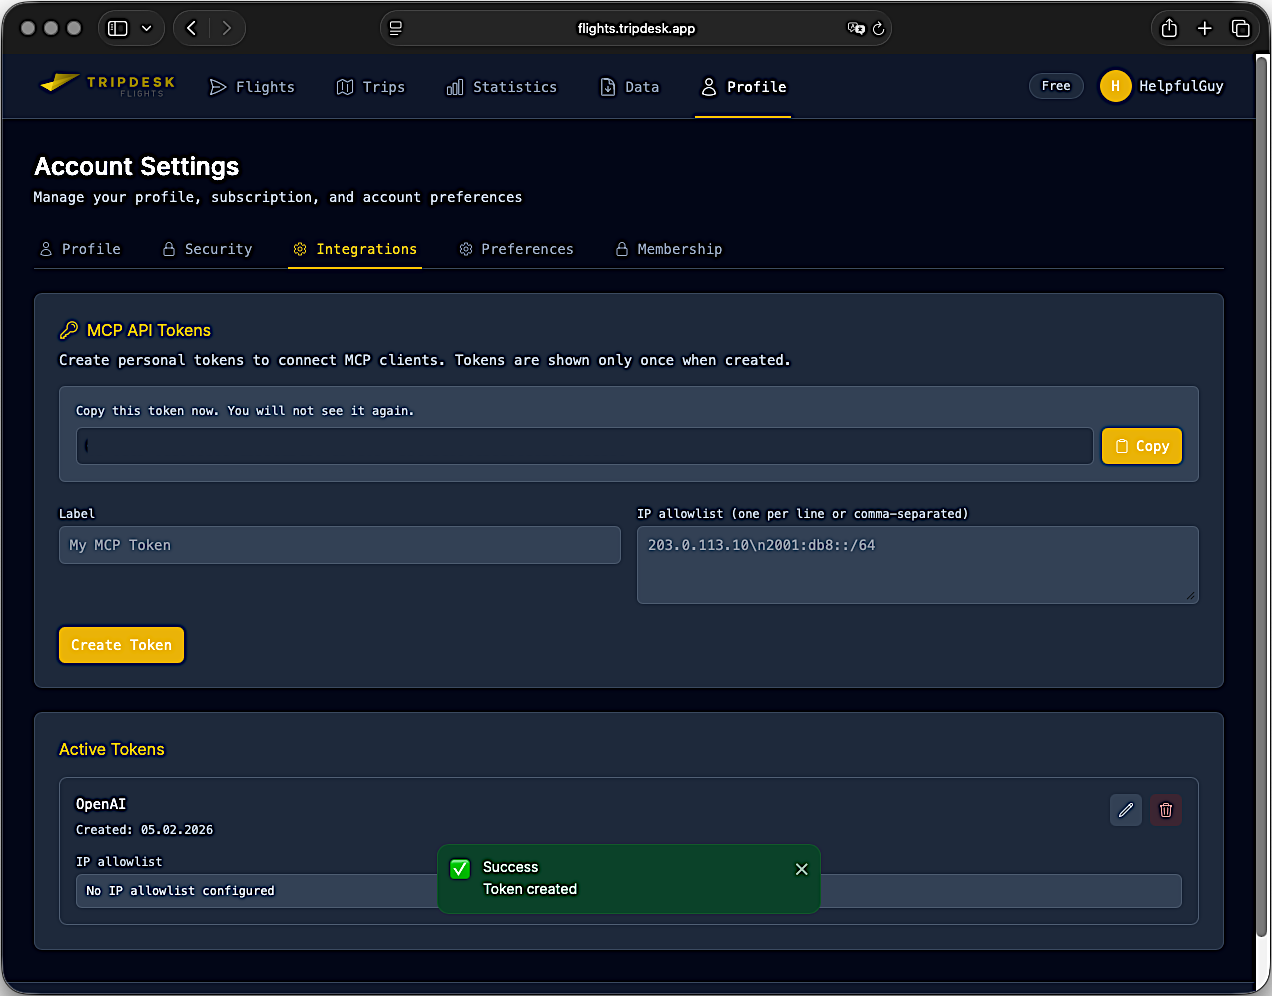
6.3.2 Use Case: Claude Dektop
Download Claude Desktop
Download Claude Desktop at https://claude.com/download and follow the installation instructions.
Download Node.js
Node.js is not a special app-specific tool; it is a widely used runtime platform maintained by a large open-source community and used by many mainstream developer tools. In your case, it is only needed to run npx mcp-remote, which acts as a transport layer between Claude Desktop and the hosted Flight Thing MCP endpoint. The business logic and data handling still happen on the server side (https://flightthing.com/api/mcp), not on the user’s machine.
Download Node.js at https://nodejs.org/en/download/current and follow the installation instructions.
Configure Claude Desktop
Open the menu path Claude -> Settings -> Developer and click on Edit Config. A JSON file claude_desktop_config.json will open.
Paste this code into the file and save it:
{
  "mcpServers": {
    "flightthing": {
      "command": "npx",
      "args": [
        "-y",
        "mcp-remote",
        "https://flightthing.com/api/mcp",
        "--header",
        "x-mcp-token: YOUR_TOKEN_HERE"
      ]
    }
  }
}
Restart Claude Desktop to apply the new configuration.
Use of Claude Desktop
Start chatting with Claude Desktop.
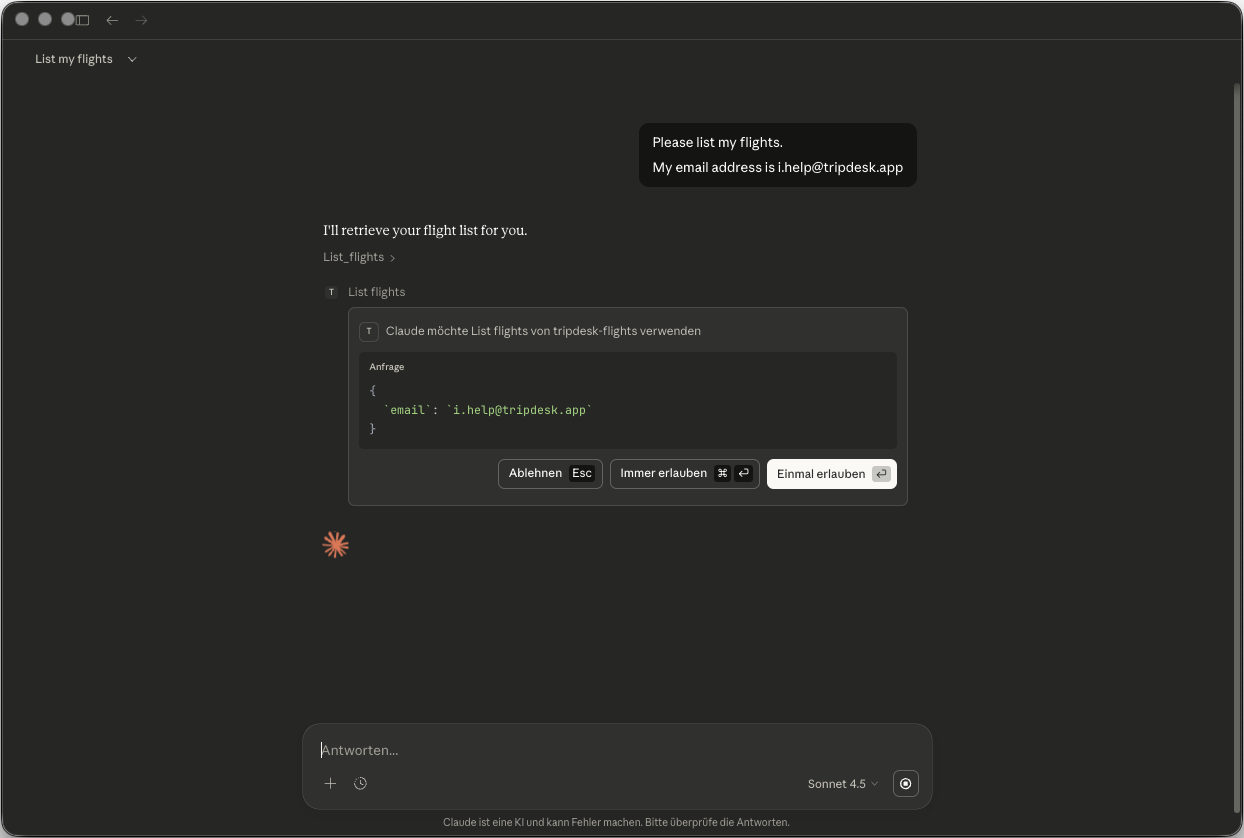
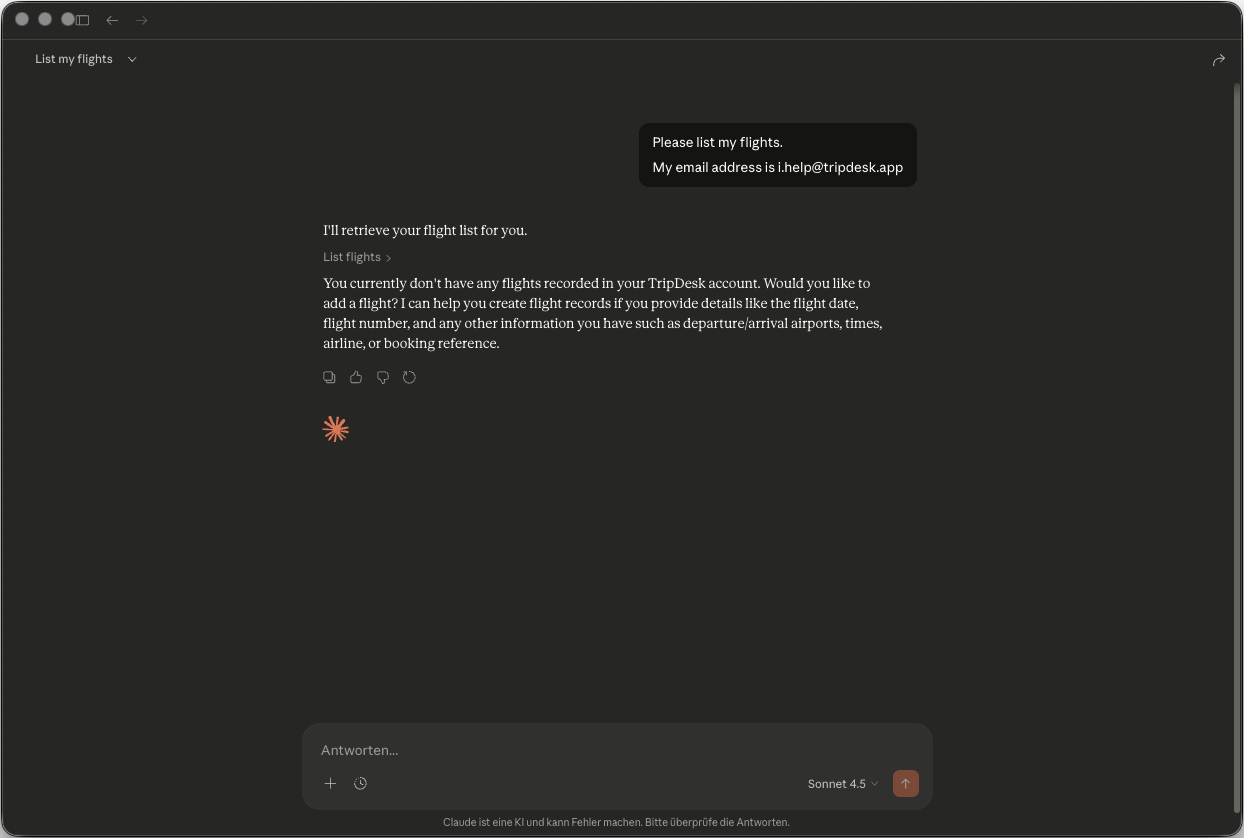
In this example we would like to lists all flights (as the account is new, there should be no flights yet).
Prompt:
"Please list my flights. My email address is <PLACE YOUR ACCOUNT EMAIL ADDRESS HERE>."
The email address works as a second sign-in factor and secures your account. The configured token must match your account's email address.
Confirm the security question (always or once).
The result is empty, as we do not have any flights yet in the system.
So let's create one.
Prompt:
Please add flight LX65 for tomorrow. Reason is business, seat is 5K in business class.
Confirm security questions, if any.
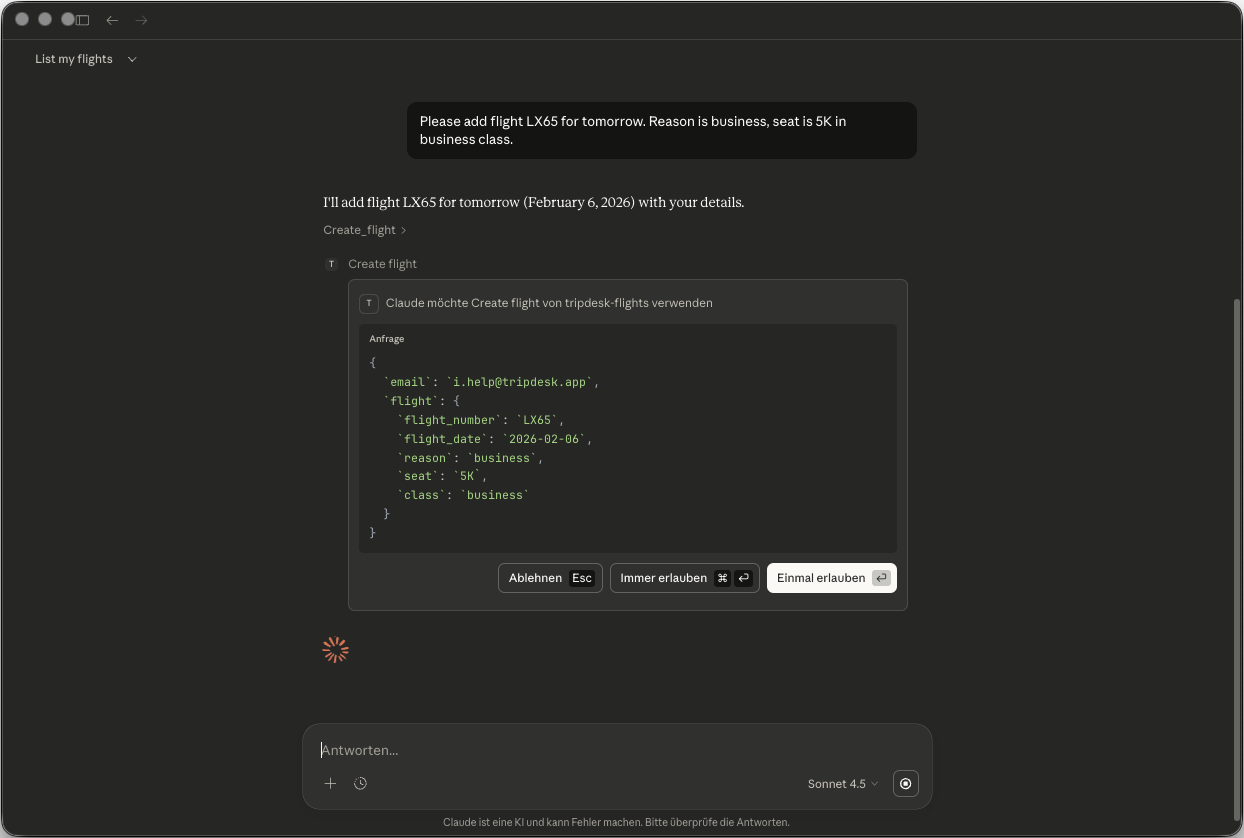
The flight will be added. However, the segment looks quiet empty.
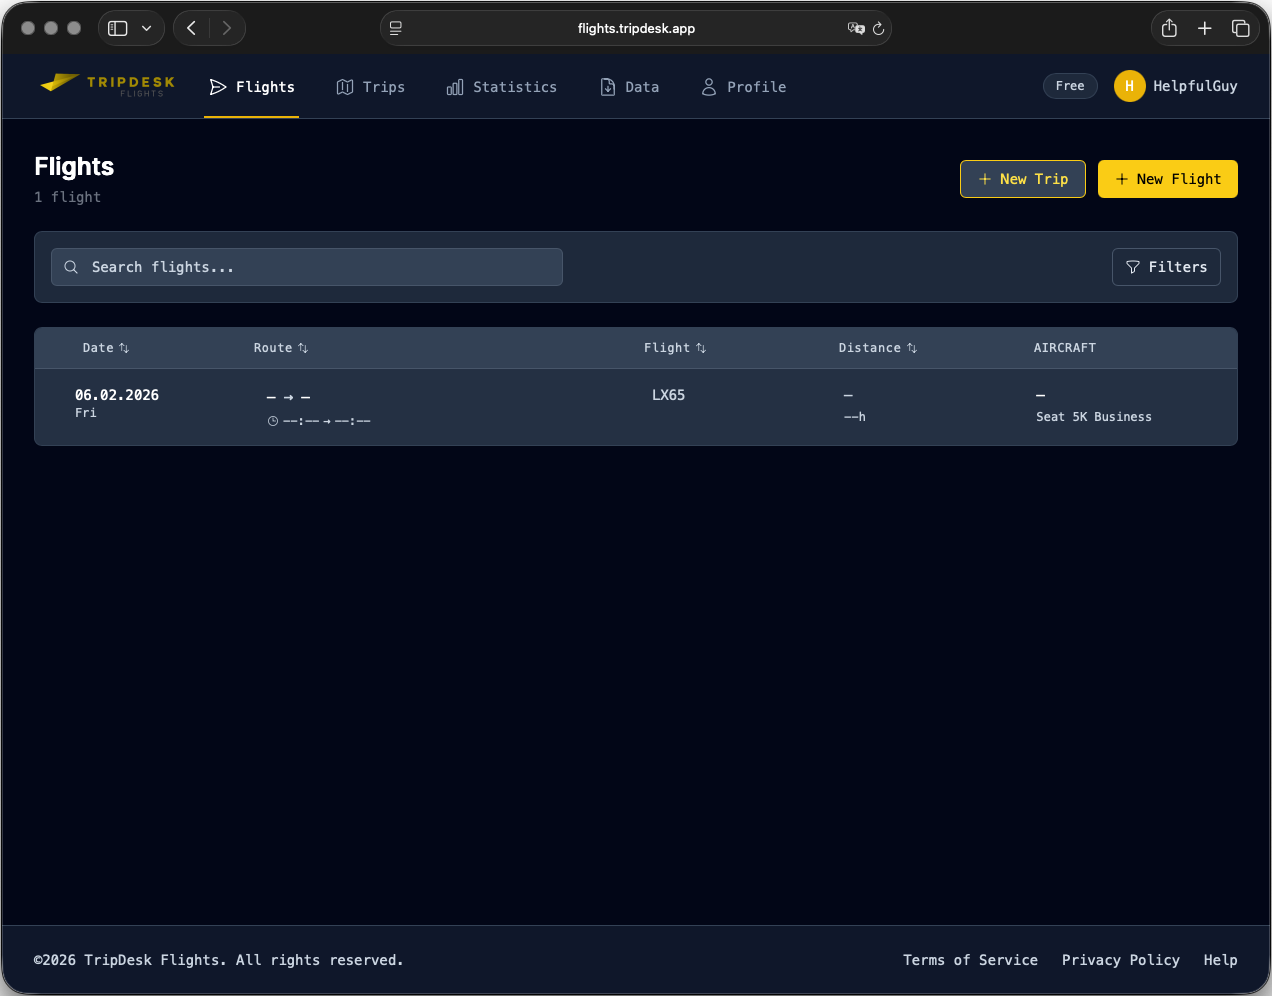
It is necessary to enrich the record with some more data. We could have provided all necessary values in the prompt before, but there is a more convenient way as the flight data is no individual data. We pull this from live data sources.
Prompt:
Yes, please update from live data.
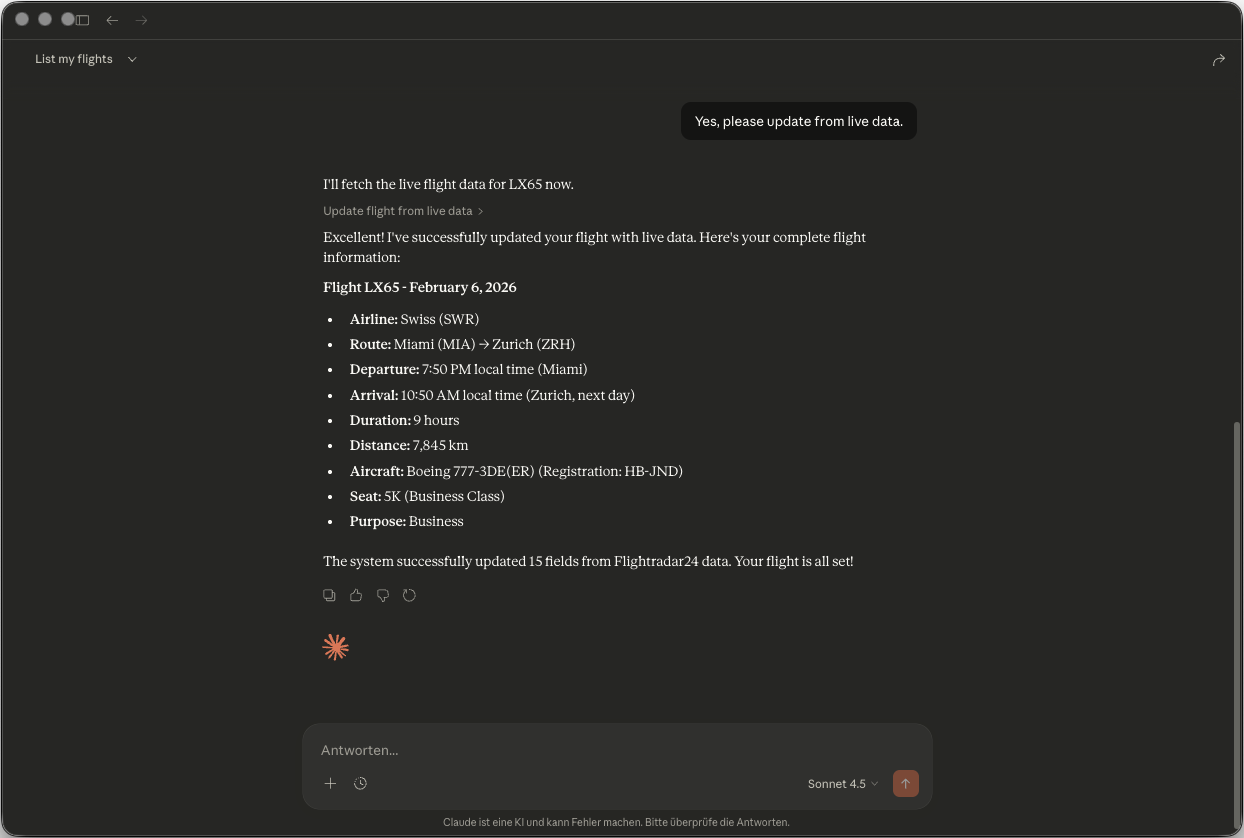
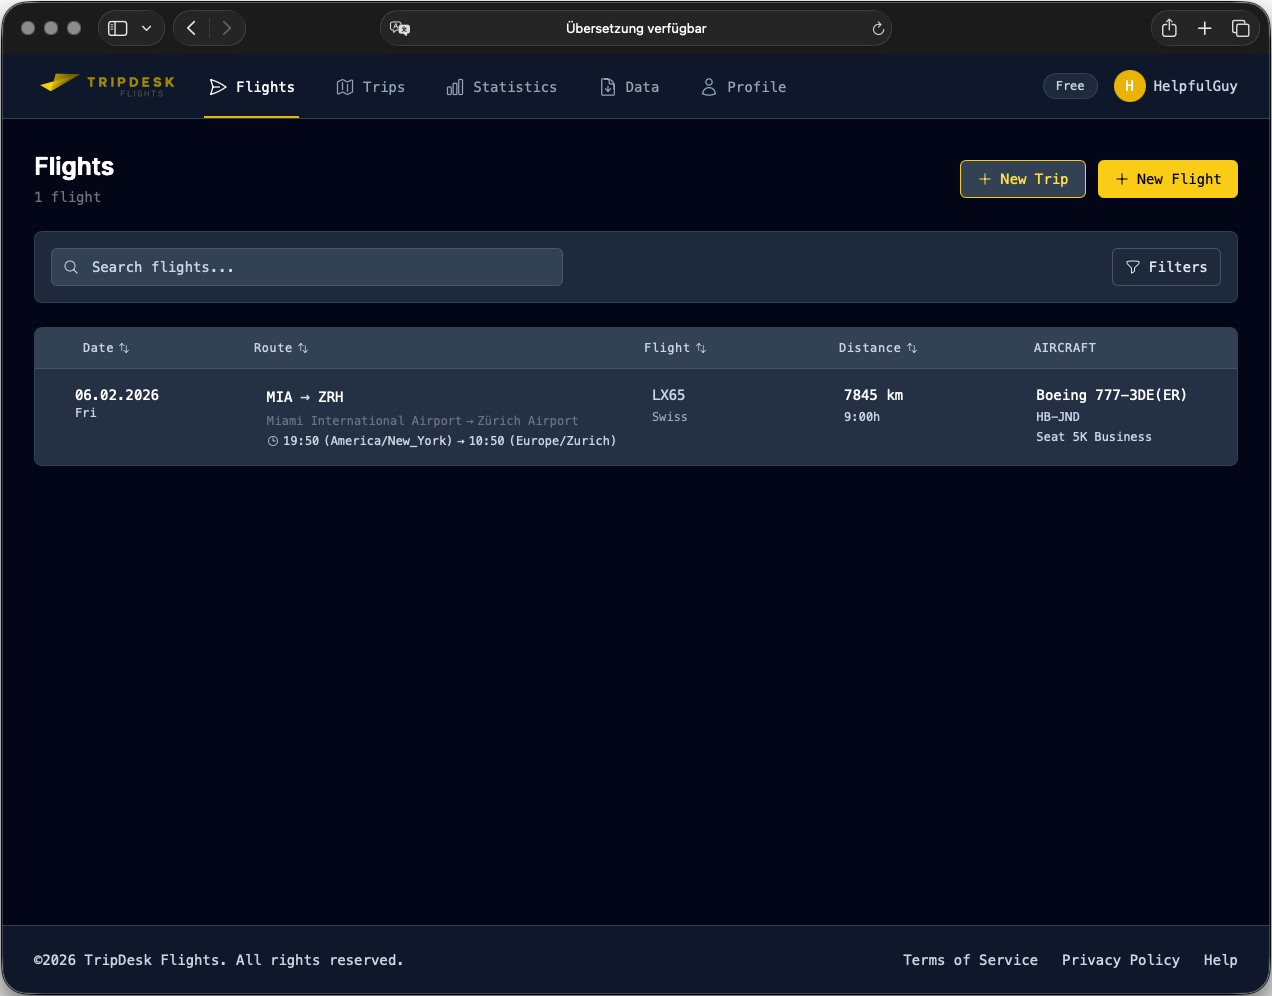
Now we see a complete flight segment record.
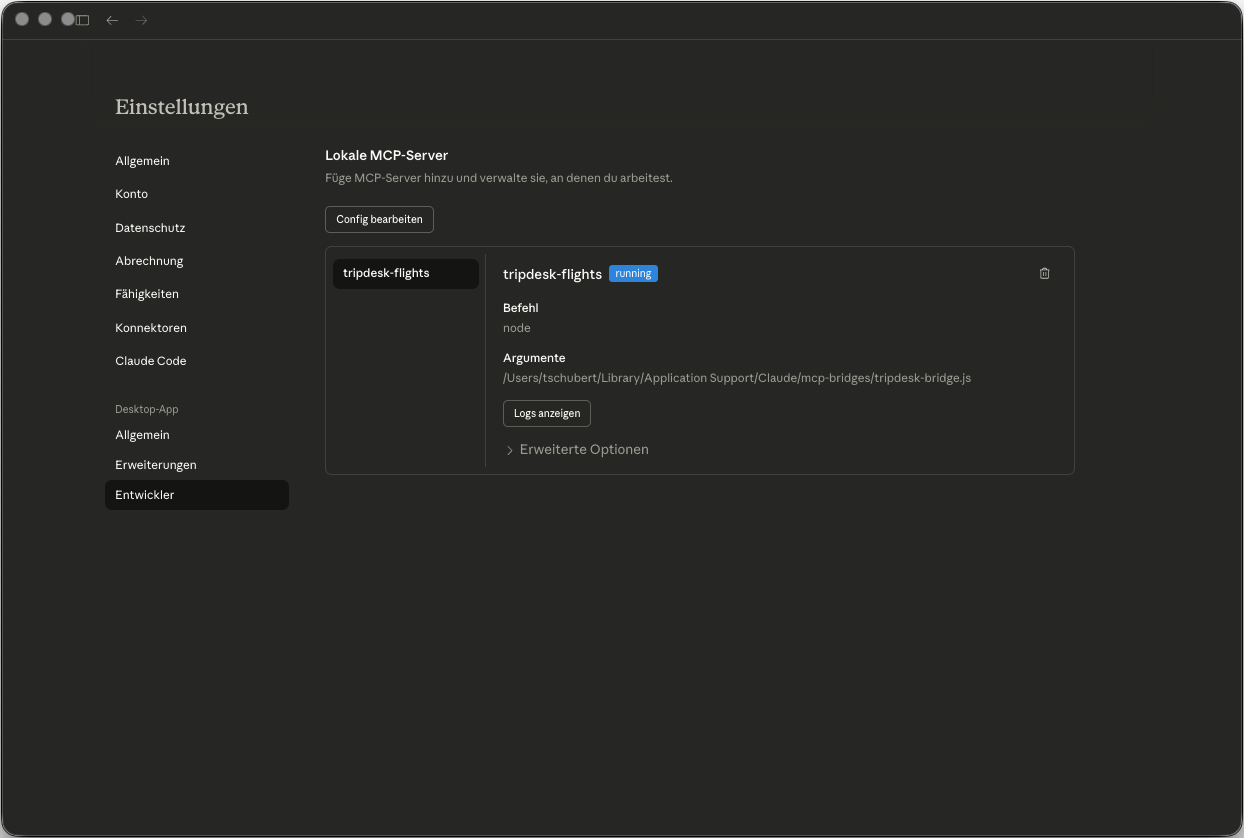
We set the configuration by terminal command from the command prompt. Your just installed file aka settings are also accessible via the Claude Desktop UI.
Open the Settings section in the menu bar, then click subtopic Developer.
However, Claude Desktop has currently no form based editor for maintaining those setting. Changes must be made in the file claude_desktop_config.json directly.
6.3.3 More Use Cases
You can use the MCP server with all kinds of applications, which support this protocol.
In Cursor IDE the MCP server coding is like this (probably not useful, just to give an idea). Add a new MCP server in Cursor settings:
{
  "mcpServers": {
    "tripdesk-flights": {
      "url": "[https://flightthing.com/api/mcp](https://flightthing.com/api/mcp)",
      "headers": {
        "x-mcp-token": "-----YOUR_TOKEN_HERE-----"
      }
    }
  }
}
The individual formatting depends on the requirements of your client application.
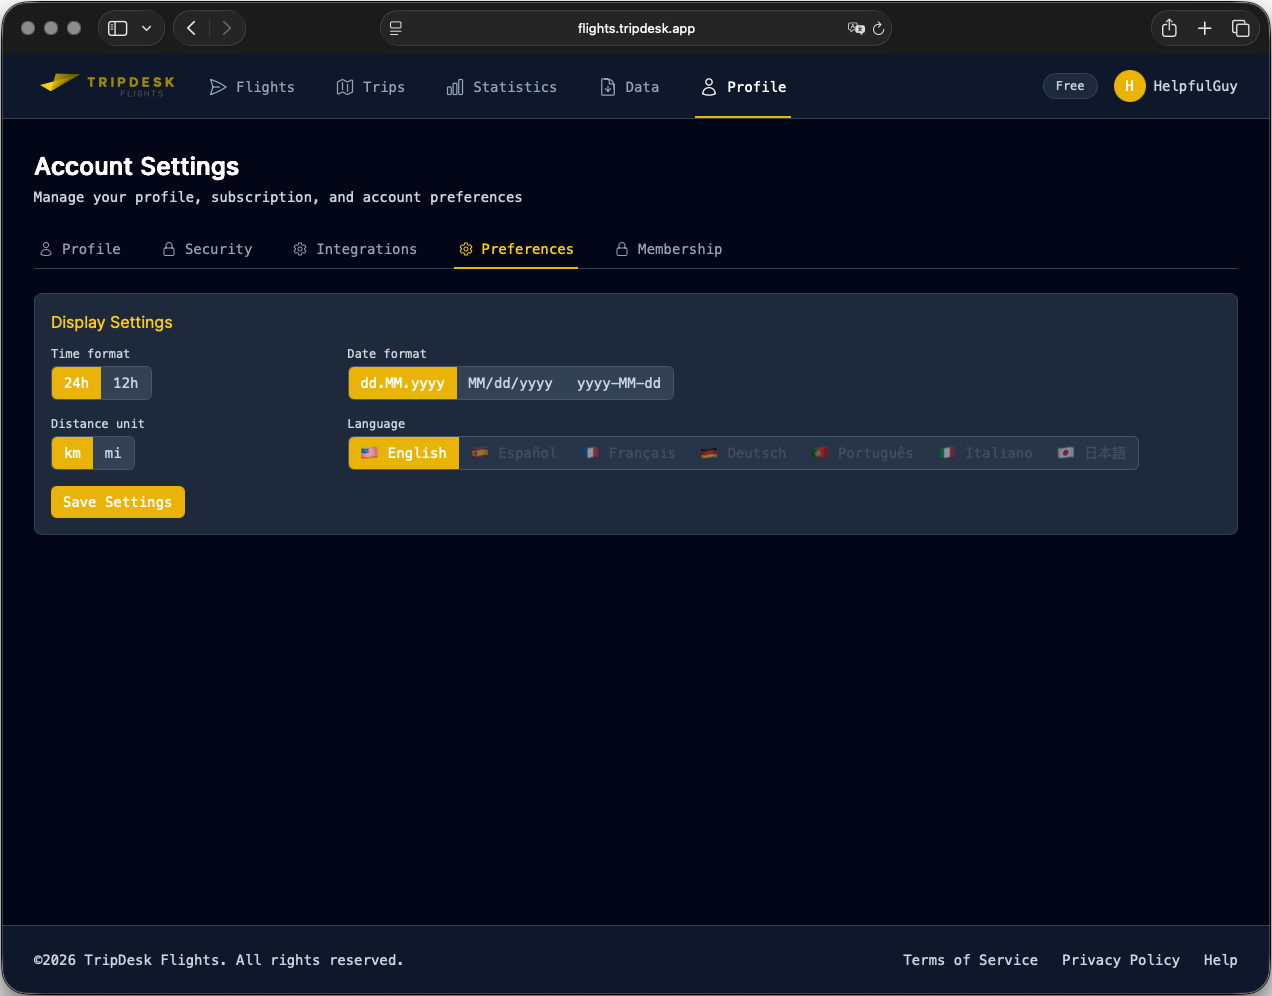
6.4 Preferences
Set your preferences regarding formats and units here. Translation is a future feature, only English is available currently.
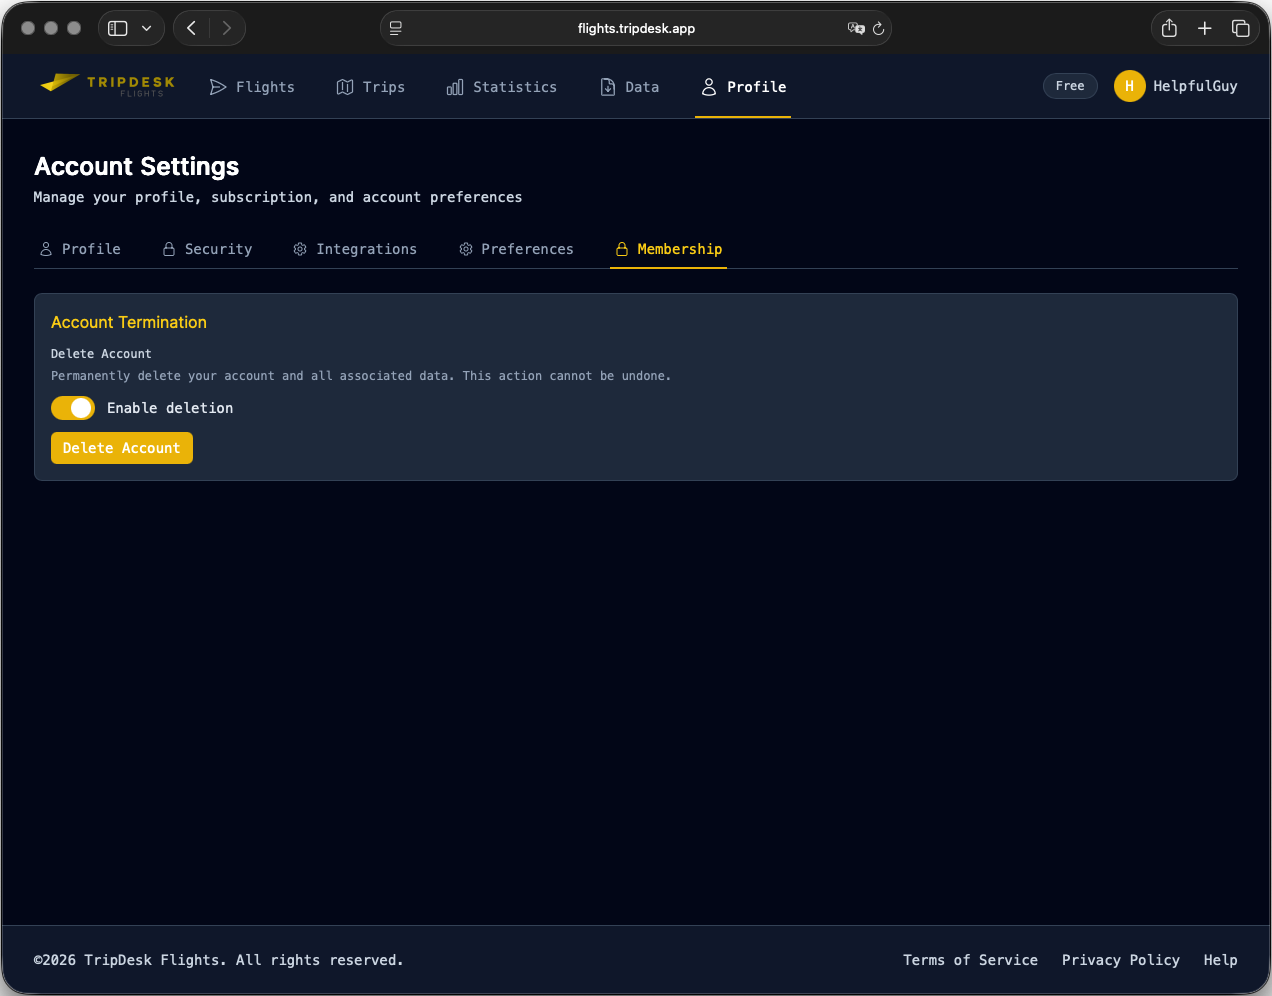
6.5 Membership
Shift the enabling button to the reight-hand side. This will enable the deletion button. Your complete account will be deleted after this.
6.6 Sign Out
By clicking on your username in the upper right-hand side a context menu will open. You can logoff from the application by clicking Sign out.
7 Legal Information
7.1 Terms of Service
Find our terms of service under https://flightthing.com/terms.
7.2 Privacy Policy
The privacy statement is linked to https://flightthing.com/privacystatement.